Authentication
In the following guide, you will get more familiar with the Authentication tab of the InPlayer Dashboard Settings.
The Authentication tab is where you’ll set up the settings that have to do with how your customers access your content.
This includes things like enabling your customers to use their social platform accounts to register and log in, limiting the number of devices they can watch on using the same account, adding geo and domain restrictions, and more.
The Authentication section has multiple tabs. Let’s take a look at them.
In the Social login tab, you can let your customers use their Facebook, Twitter, or Google accounts to register and log into your platform, instead of them using the standard paywall register and login forms.
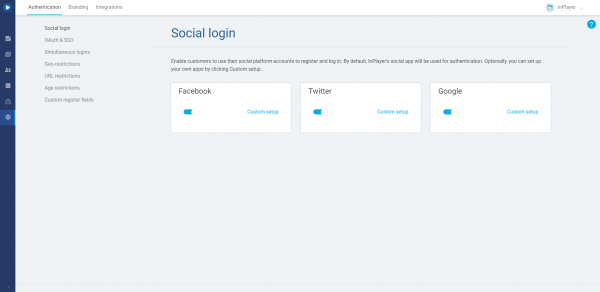
To enable or disable the social logins, just click on their respective toggles.
Once enabled, the social login buttons will appear on the paywall.
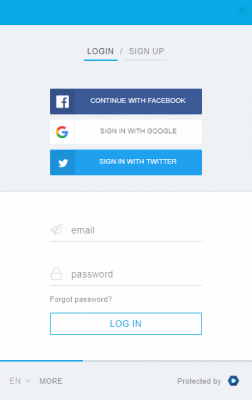
By default, our platform will use our own social apps to manage the customer logins, but you can also use your own apps by clicking on Custom setup and setting them up.
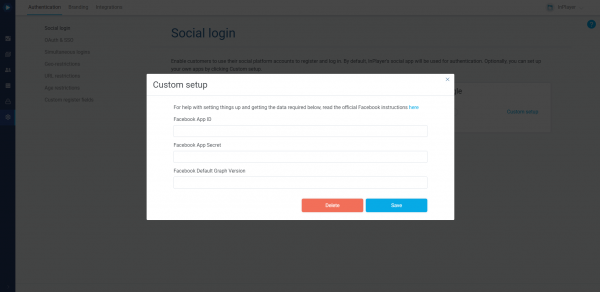
When setting up the apps in their respecting social dashboards, make sure to use the following URLs:
Facebook:
services.inplayer.com/accounts/social/callback?source=facebook
services.inplayer.com/
Twitter:
https://services.inplayer.com/accounts/social/callback
Google:
https://services.inplayer.com/accounts/social/callback?source=google
OAuth and SSO are two features of our platform that can be very useful if you have content across multiple domains.
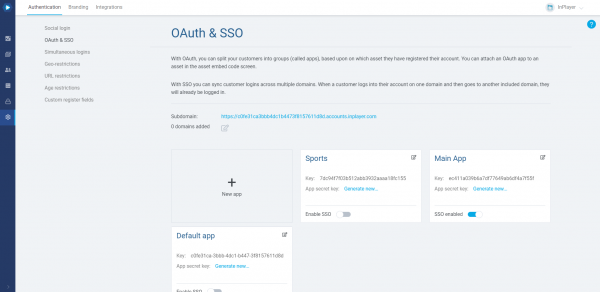
With the OAuth feature, you can group the customers into separate user groups (called OAuth apps or applications), based on on which asset they have registered their account.
This can be very useful when making reports because you will have an easy way of seeing how many people registered for what, in case you want to divide your assets into separate groups.
To use the OAuth feature, you first need to create the user groups into which your customers will be divided. We call these user groups OAuth apps.
You can then attach an OAuth app to each of your assets, so whenever a customer registers an account on that asset, they would become a part of that user group.
You will notice that you already have one OAuth app, i.e. the Default app. This is the default group to which all the customer registrations and login records will go to.
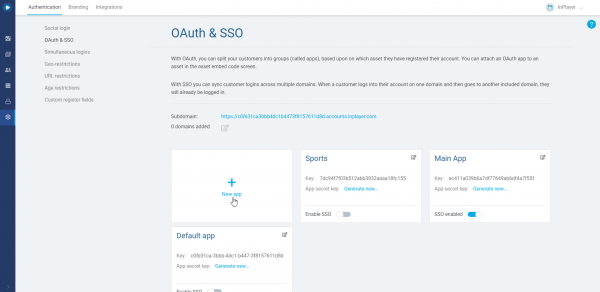
To create a new OAuth app, click on the New app box.
Give your new app a name (you can use the name of your website for example), and click Create.
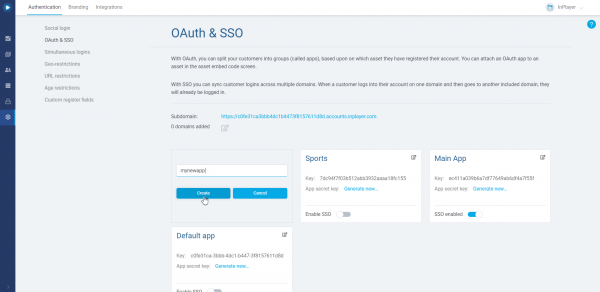
You can add as many OAuth apps as you want.
Using the OAuth feature is very simple. All you have to do is choose the OAuth app you want to use for an asset, while you are getting the embed code for that asset.
In the Assets tab of your InPlayer Dashboard, go to the asset to which you wish to attach an OAuth app, and open it by clicking ![]() .
.
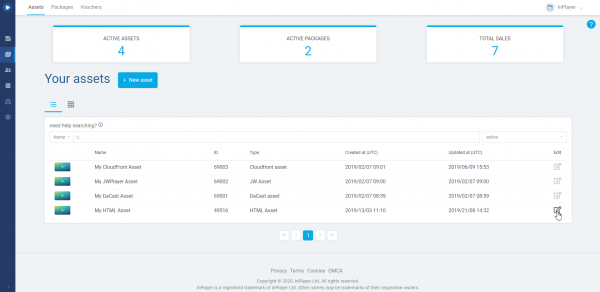
Click on the Get asset embed code button at the top right.
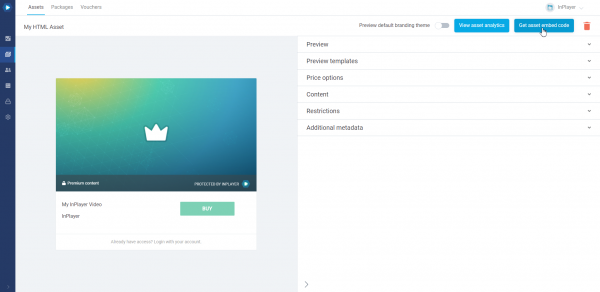
Select the OAuth app you wish to use.
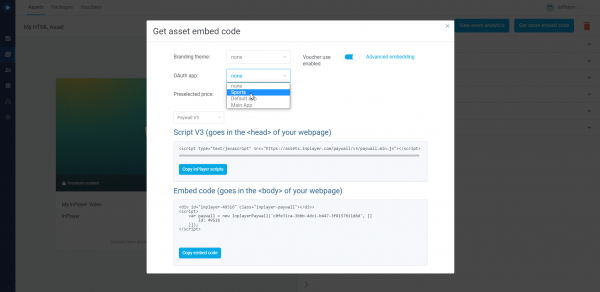
Get the embed codes for the asset and put it up on your webpage like you normally would.
With that, every time a customer registers their account on that asset, they will be grouped into the user group of the selected OAuth app.
With the SSO (Single-Sign-On) feature, you can make it so whenever a customer logs in to one of the websites you’ve specified, they will automatically be logged into the other websites as well, and will not have to log in again if they go there.
This greatly streamlines the customer experience.
The SSO works as an extension of the OAuth feature, which means you have to attach an OAuth group on an asset to be able to use the SSO for it as well. Also, the SSO only works within the OAuth app that has been selected for that group of assets, and not with assets that have been set up with different OAuth apps.
Enabling the SSO feature
To enable the SSO feature, first click on SSO Enable.
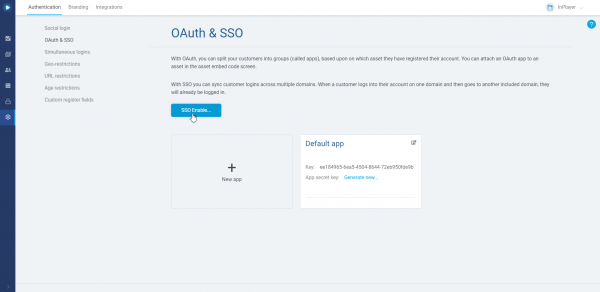
You can now enable the SSO feature for all your OAuth apps.
To do this, just click the Enable SSO toggle on the OAuth app.
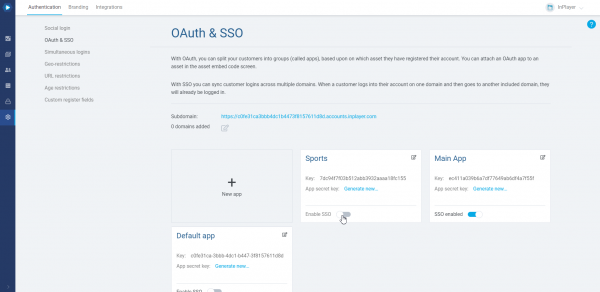
With that, the SSO is activated for that OAuth app.
Every time you set up an asset to use that OAuth app, you will have the option to enable the SSO feature for it as well.
We will see how to do this further down in this article.
But first, you need to add the domains on which your customers will be automatically logged in as soon as they log into just one.
To do that, click on the ![]() button.
button.
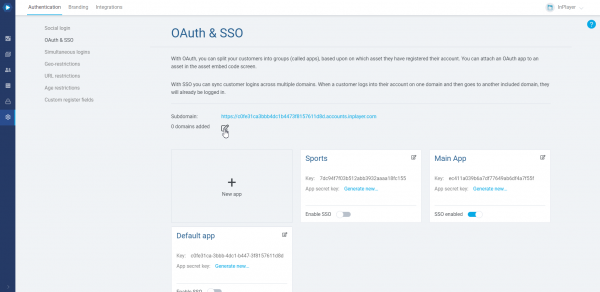
Click on Add domain, type in your domain and click Save.
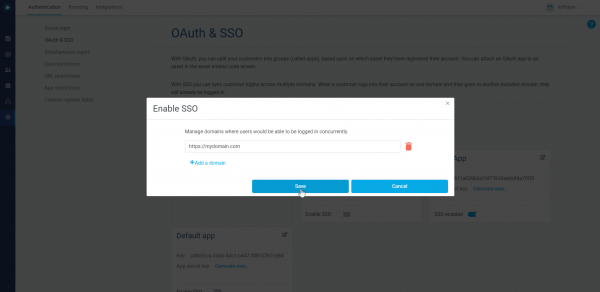
Make sure you do not add a / at the end of the domain, nor any other special characters.
You can add as many domains as you wish.
If you ever wish to remove a domain, just click the ![]() button next to it.
button next to it.
Using the SSO feature
Using the SSO feature is very simple. All you have to do is enable it in an asset when you are getting the embed code for it.
In the Assets tab of your InPlayer Dashboard, go to the asset to which you wish to attach an OAuth app, and open it by clicking ![]() .
.

Click on the Get asset embed code button at the top right.

Select the OAuth app you wish to use.

Once you select the OAuth app, you will see an Enable SSO toggle right next to it.
To enable or disable the SSO, just click on the toggle.
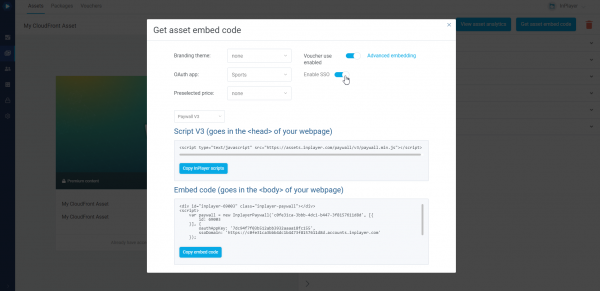
If you don’t see the toggle, go back to the OAuth & SSO tab and make sure the SSO feature for the OAuth you are using is enabled.
With that, every time a customer registers or logs into that asset, they will be logged into all domains (websites) that you’ve added in the SSO settings.
Once you set up the SSO, you can embed the asset on your webpage like you normally would.
You can disable the SSO feature at any time by going to the OAuth & SSO tab and clicking on the SSO toggle.
In the Simultaneous logins tab, you can limit how many simulations logins your customers can have when using a single account, thereby preventing the sharing of credentials.
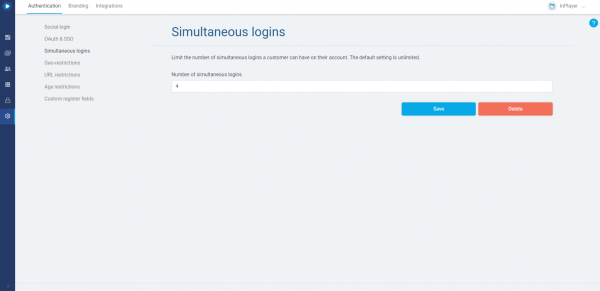
This is left as blank by default, which means there are no restrictions on the number of simulations logins.
To limit the session, just enter the maximum number of active sessions in the field.
As soon as a customer surpasses that number, they will be logged out of the first session they’ve logged into. The log out will happen immediately, without the need for the customer to refresh their page.
Note that if you are using multiple OAuth apps, the concurrent session setting will work per single OAuth app.
In the Geo-restrictions tab, you can restrict access to your content based on the customer’s country.
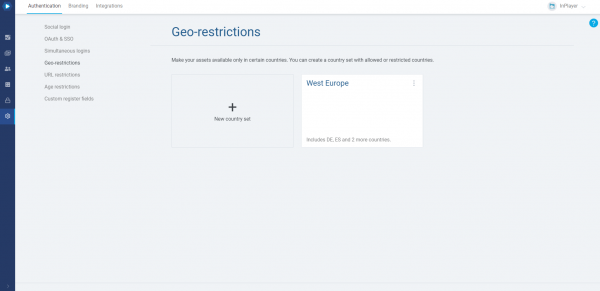
To restrict the content, you first need to create a country set, which you can then use as the default geo-restriction set, or use it on a single asset only.
Creating a Country set
To create a new country set, click on New country set.
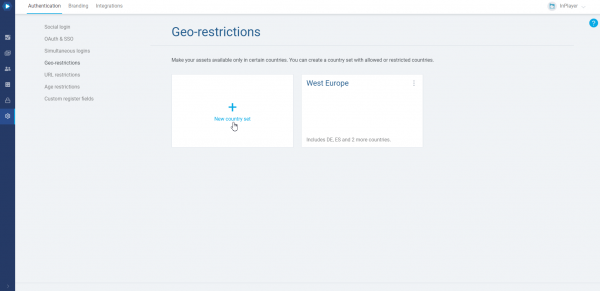
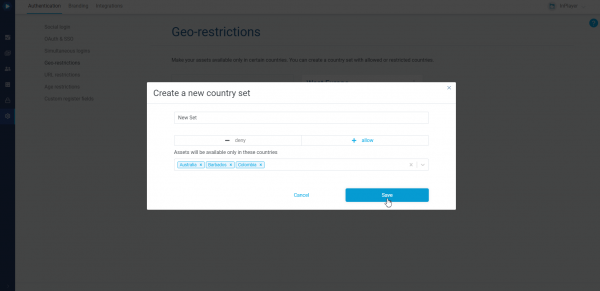
You can either allow a set of countries, thereby making the assets only available there, or deny a set of countries thereby making the asset available everywhere but there.
Set everything up and click Save.
After you create a country set, you can either set it up as a default set, so it affects your entire content, or use it as an asset-specific restriction, which affects a single asset. Note that the asset-specific restrictions will always override the default restrictions. In addition, you can also use the country sets created here for geo-restricting individual asset prices, so that they only appear in certain countries.
Setting up a default geo-restriction
The set you set up as default in the Geo-restrictions tab of the Settings will affect your entire content, i.e. all of your assets.
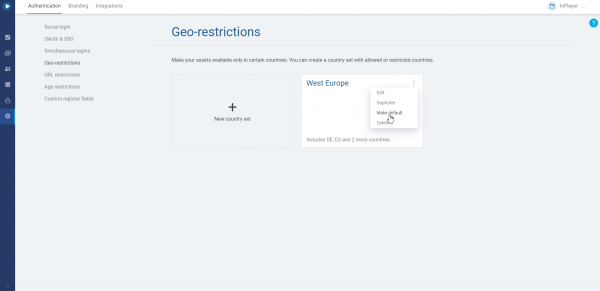
To do this, click on the three dots in the upper right corner of the country set, and then click on make default.
Setting up an asset-specific geo-restriction
An asset-specific geo-restriction will affect only a single asset.
You can set it up in the asset’s settings.
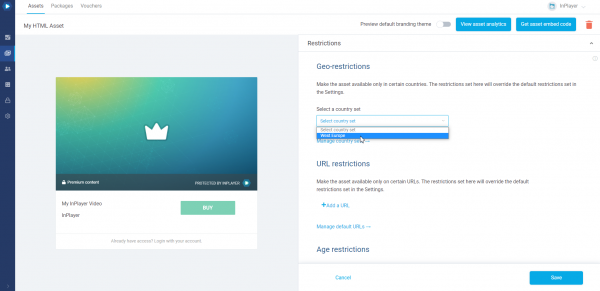
To do this, open the asset, go the Restrictions section, and under Geo-restrictions select the country set you wish to use for the asset.
Setting up a price-specific geo-restriction for an asset
In addition to being able to geo-restrict a single asset, we can go one step further and geo-restrict only a single price option of an asset.
To do this, open the asset, go to the Price options section, and open the price you wish to restrict by clicking on the ![]() button.
button.
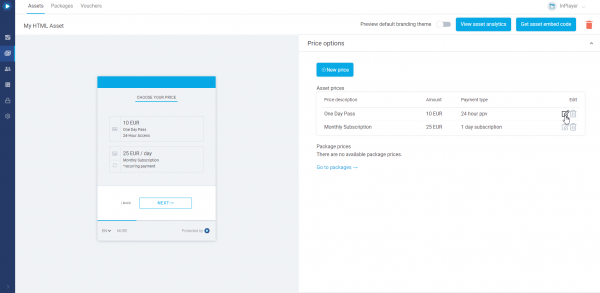
Then go to the Additional info tab and check the Geo-restriction setting.
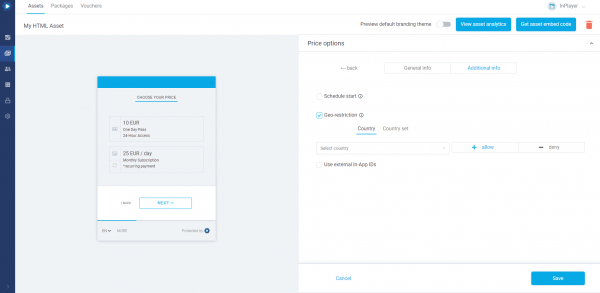
Here, you can either restrict the price in a single country, or use a country set you’ve created previously.
Similar to the geo-restrictions, in the URL restrictions tab you can limit the availability of your content based on a webpage.
This means that your assets will only be embeddable on webpages specified by you.
When using the URL restriction make sure to add the exact page URL where your asset is going to be embedded, and that you do not add a / at the end of the URL, nor any other special characters.
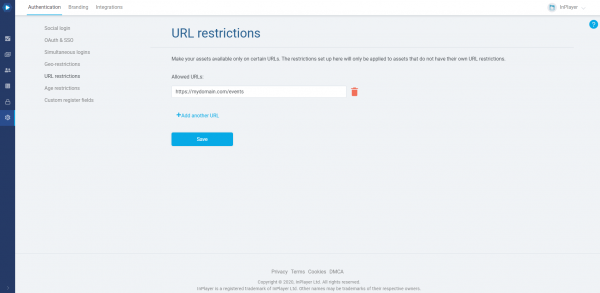
You can set up a default URL restriction that affects your entire content, or an asset-specific URL restriction, which affects a single asset. Note that the asset-specific restrictions will always override the default restrictions.
Setting up a default URL restriction
The domain you set up in the URL restrictions tab of the Settings is going to be the default restriction, and will affect your entire content, i.e. all of your assets.
To do this, click on Add a URL.
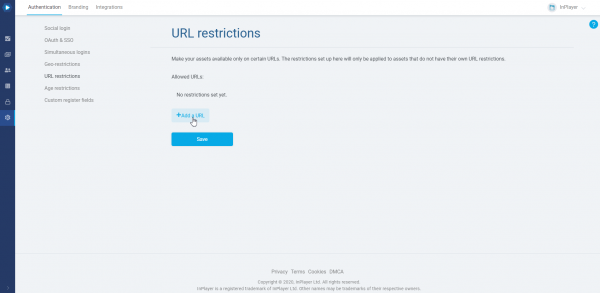
Enter your URL and click Save.
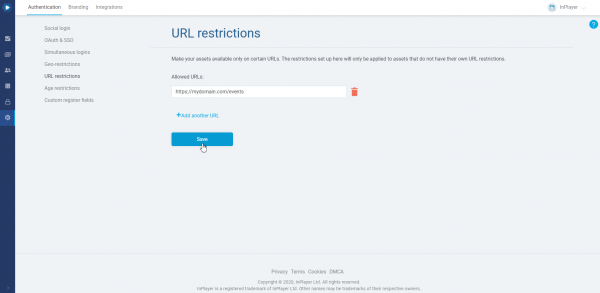
As we mentioned, make sure to add the exact page URL where you’re asset is going to be embedded, and that you do not add a / at the end of the domain, nor any other special characters.
If you ever wish to remove a webpage, just click the ![]() button next to it.
button next to it.
Setting up an asset-specific URL restriction
An asset-specific URL restriction will affect only a single asset.
You can set it up in the asset’s settings.
To do this, open the asset, go the Restrictions section, and under URL restrictions, click Add a URL and enter the domain.
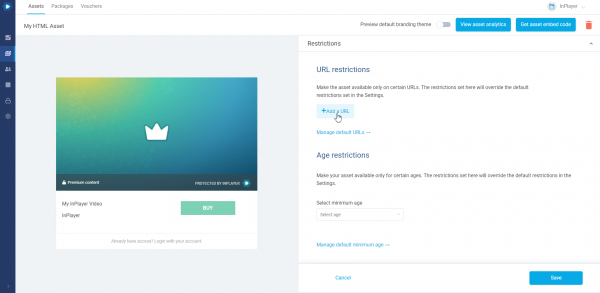
Make sure you do not add a / at the end of the URL, nor any other special characters.
The age restriction tab gives you a way to restrict access to your content based on age.
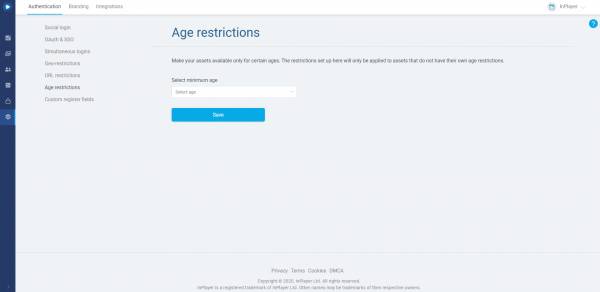
The feature is not enabled by default, but if you want to use it, just send us an email on support@inplayer.com and we will enable it for you.
When a customer tries to purchase an asset that has been age-restricted, they will have to confirm their date of birth.
If their age is less than the one set up in the InPlayer Dashboard, they will not be granted access.
You can set up a global age restriction that affects your entire content, or an asset-specific age restriction, which affects a single asset. Note that the asset-specific restrictions will always override the global restrictions.
Setting up a global age restriction
The age restriction you set up in the Age restrictions tab of the Settings is going to be the global restriction, and will affect your entire content, i.e. all of your assets.
To do this, select the minimum age from the drop-down menu.
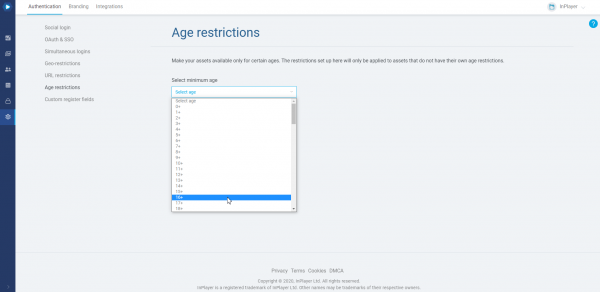
Then click Save.
Setting up an asset-specific age restriction
An asset-specific age restriction will affect only a single asset.
You can set it up in the asset’s settings.
To do this, open the asset, go the Restrictions section, and under Age restrictions select a minimum age.
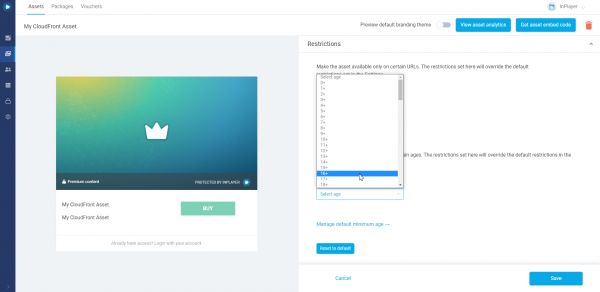
Make sure to click the Save button in the bottom right corner.
How it works
When a customer tries to purchase an asset that is age-restricted, they will first need to enter their date of birth.

Upon entering their age, they will receive an email with a PIN number.
They will need to enter this PIN on the next screen on the paywall.

They will be able to use the same PIN each time they log in, but they can also get a new one, in case they lose or forget it.
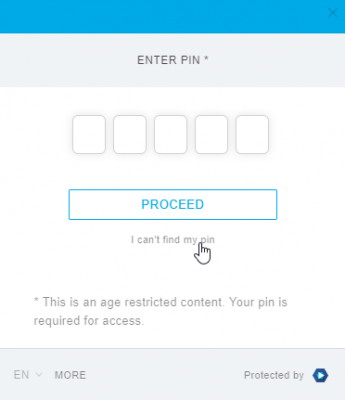
When they enter their PIN, if their age is equal or greater than the one set up in the age restriction settings, they will be able to purchase the asset and watch the content.
The PIN enables the customer to watch for one hour. After the hour is up, the PIN window will appear again and the customer will need to enter it again so they can continue watching.
If the customer’s age is lower than the one set up in the age restriction settings, they will be shown the below message, and won’t be able to watch the content.

Custom register fields are additional fields on the paywall’s registration form. They can be used to gather all kinds of metadata from your customers. These details will help you discover, identify and describe your customers, and understand their connection and feelings about your product or service.
For each of the custom register fields, you can set up whether they are going to be required or non-required.
Adding custom register fields
To add a custom field, click Add custom field.
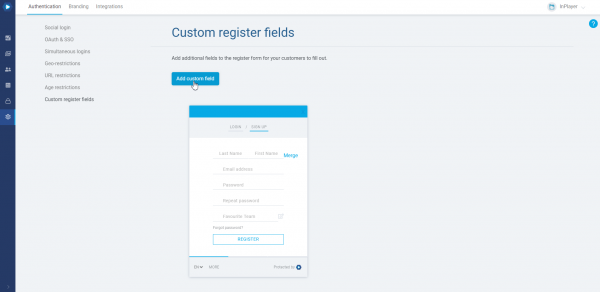
There are several different types of custom fields.
Text
The text field is where your customers can type in text.
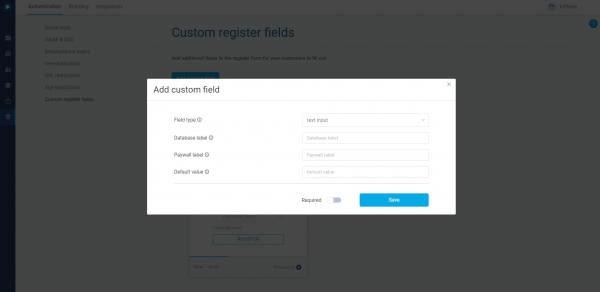
- Database label – This is the name of the field which is stored in the database. Your customers will not see this.
- Paywall label – Here you can type in a short description that will tell the customers what they should enter in the field.
- Default value – This is going to be the default text in the field. You can leave this blank.
Dropdown menu
The dropdown menu field lets you add a drop-down menu to the registration form.
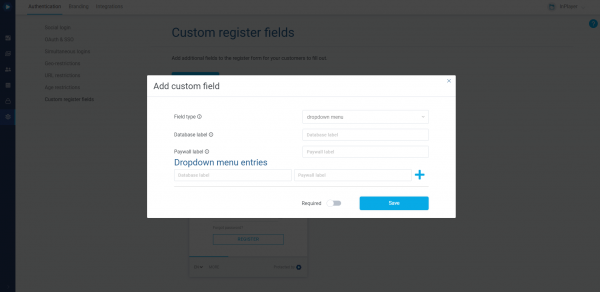
- Database label – This is the name of the field which is stored in the database. Your customers will not see this.
- Paywall label – Here you can type in a short description for the field.
- Dropdown menu entries – This is where you add the drop-down menu entires.
- Database label – This is the title of the entry that will be written in the database. Your customers will not see this.
- Paywall label – This is the title of the entry that will appear on the paywall, and what your customers will actually see.
Once you set up an entry, make sure to click the ![]() button on the right of it to save it.
button on the right of it to save it.
You can add up to 30 entries.
Radio button
The radio button field lets you add a set of multiple options from which the customer will have to select only one.
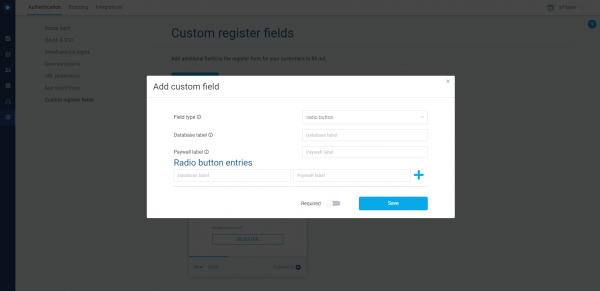
- Database label – This is the name of the field which is stored in the database. Your customers will not see this.
- Paywall label – Here you can type in the description or title of the field that your customers will see.
- Radio button entries – This is where you add the multiple options.
- Database label – This is the title of the option that will be written in the database. Your customers will not see this.
- Paywall label – This is the title of the option that will appear on the paywall, and what your customers will actually see.
Once you set up an option, make sure to click the ![]() button on the right of it to save it.
button on the right of it to save it.
Checkbox
The checkbox field lets you add a checkbox.
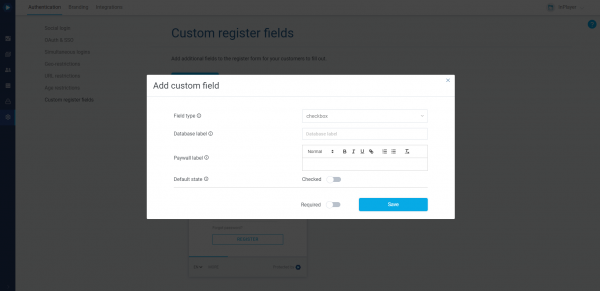
- Database label – This is the name of the field which is stored in the database. Your customers will not see this.
- Paywall label – Here you can type in the description or title of the field that your customers will see.
- Default value – Set whether the field will be checked or unchecked by default.
A very useful feature of the Checkbox custom register field is that you can add a hyperlink to the Paywall label text.
To do this, select the text you want to hyperlink to and click ![]() .
.
Country list
With the country list, your customers can select their country.
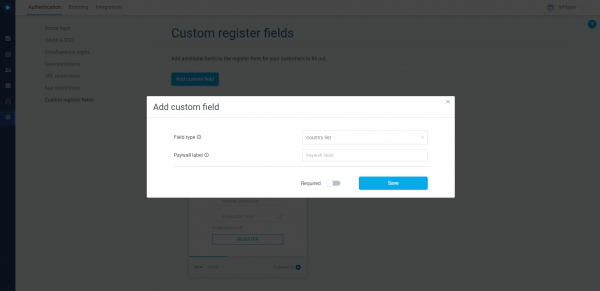
- Paywall label – Here you can type in a short description for the field.
Date picker
This will include a date picker field.
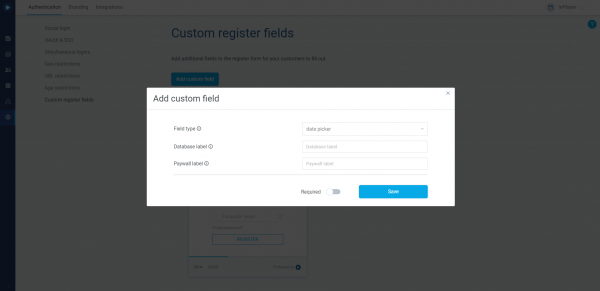
- Database label – This is the name of the field which is stored in the database. Your customers will not see this.
- Paywall label – Here you can type in the description or title of the field that your customers will see.
Modifying the custom register fields
Once created, the custom fields can always be modified.
To do this, just open the field you wish to edit by clicking on the ![]() button next to it.
button next to it.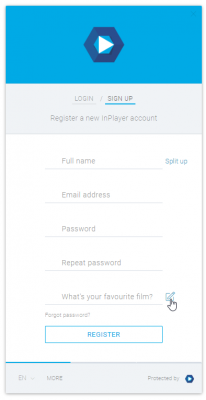
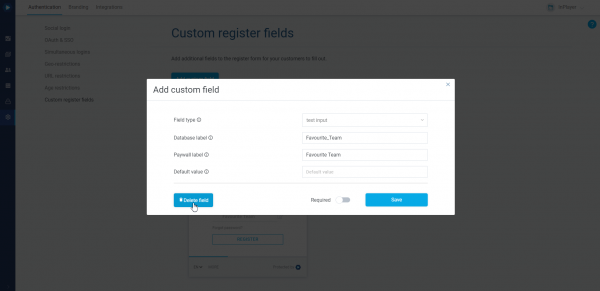
Removing a custom field
To remove a custom field, just open it, and click the Delete field button.
Getting the metadata from the custom fields
The customer metadata gathered from the custom fields can be accessed and exported at any time.
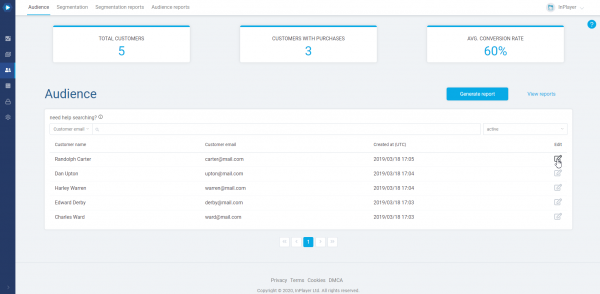
To do this, go to the Audience tab of your InPlayer Dashboard.
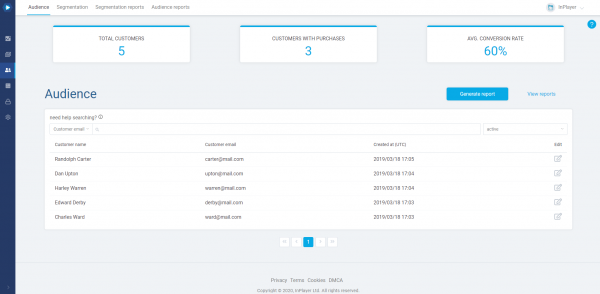
To get the customers’ metadata, just click on the ![]() button in the Edit column on the customer’s row.
button in the Edit column on the customer’s row.
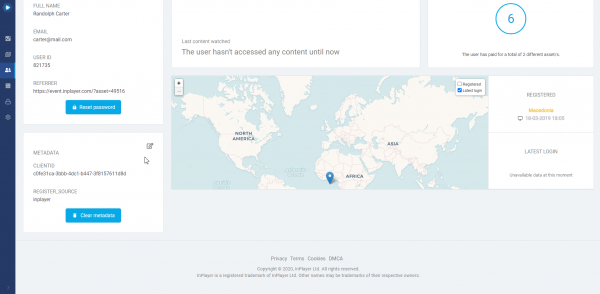
In the METADATA section, you can see the metadata that was gathered from the customer upon registration.
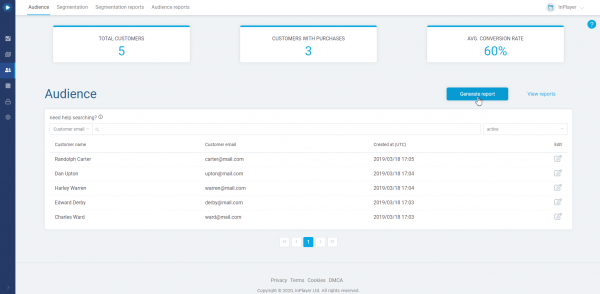
Additionally, if you want to export the data for a report, you can always do so by clicking on Generate report in the Audience tab.
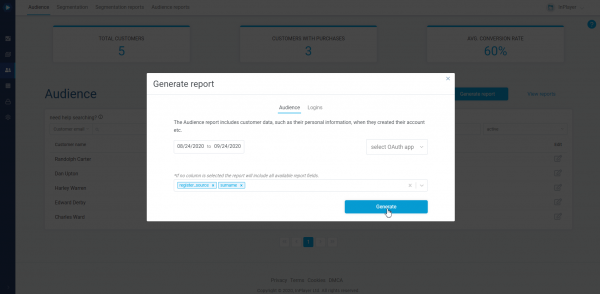
Here, in Select report columns, you can select all the fields you wish to include in your report, along with the timeframe for it.
Then click Generate.
To view the report, click on View reports.
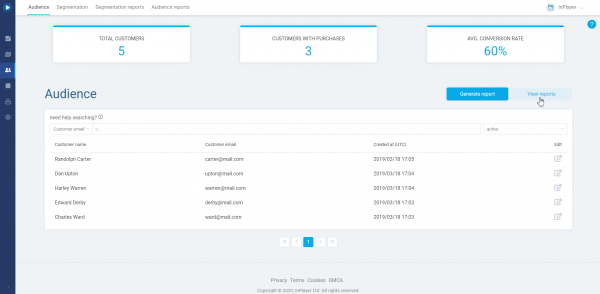
From there you can download the report as a CSV file and use it in any way you wish.
This concludes our guide.
If you have any questions, don’t hesitate to contact us on support@inplayer.com.
