Android
Docs › In-App Purchases › Android
Last updated: 15 Mar 2021 / 10:14 AM / GMT
Our monetization platform features a fully developed integration for Android in-app purchases.
If you are planning on using in-app purchases, make sure to let us know so we can enable the proper payment gateway on your account.
First, log into your InPlayer Dashboard.
Go to Settings, then to the Integrations tab, and click on In-App integrations.
Enter the Site Verification Token and the Android Service Key from your Google account, and click Save.
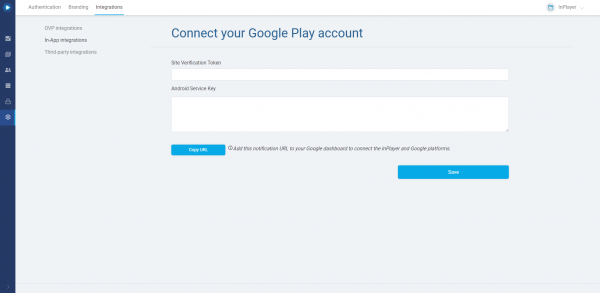
Your InPlayer and Google accounts are now integrated.
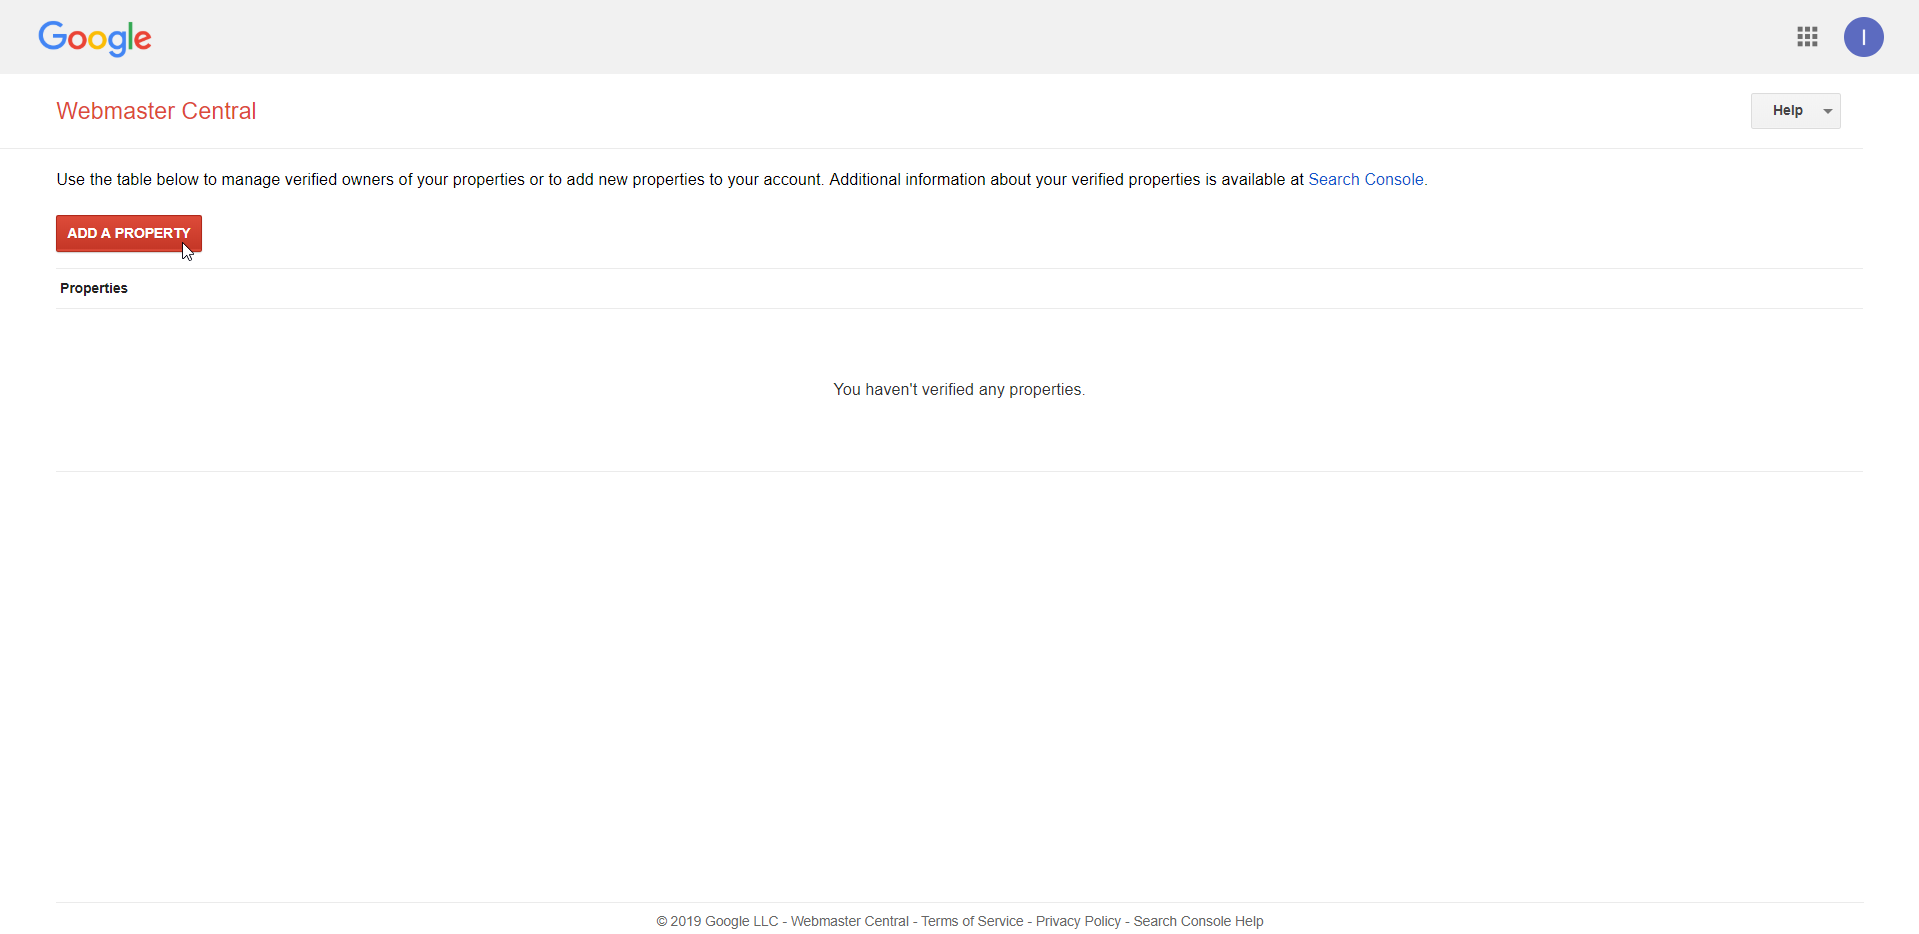
Go to Google Webmaster Central.
Click on ![]() .
.
Go back to the Integrations tab of your InPlayer dashboard.
Click the ![]() button.
button.

Paste the copied URL in the Google Webmaster Central, and click ![]() .
.
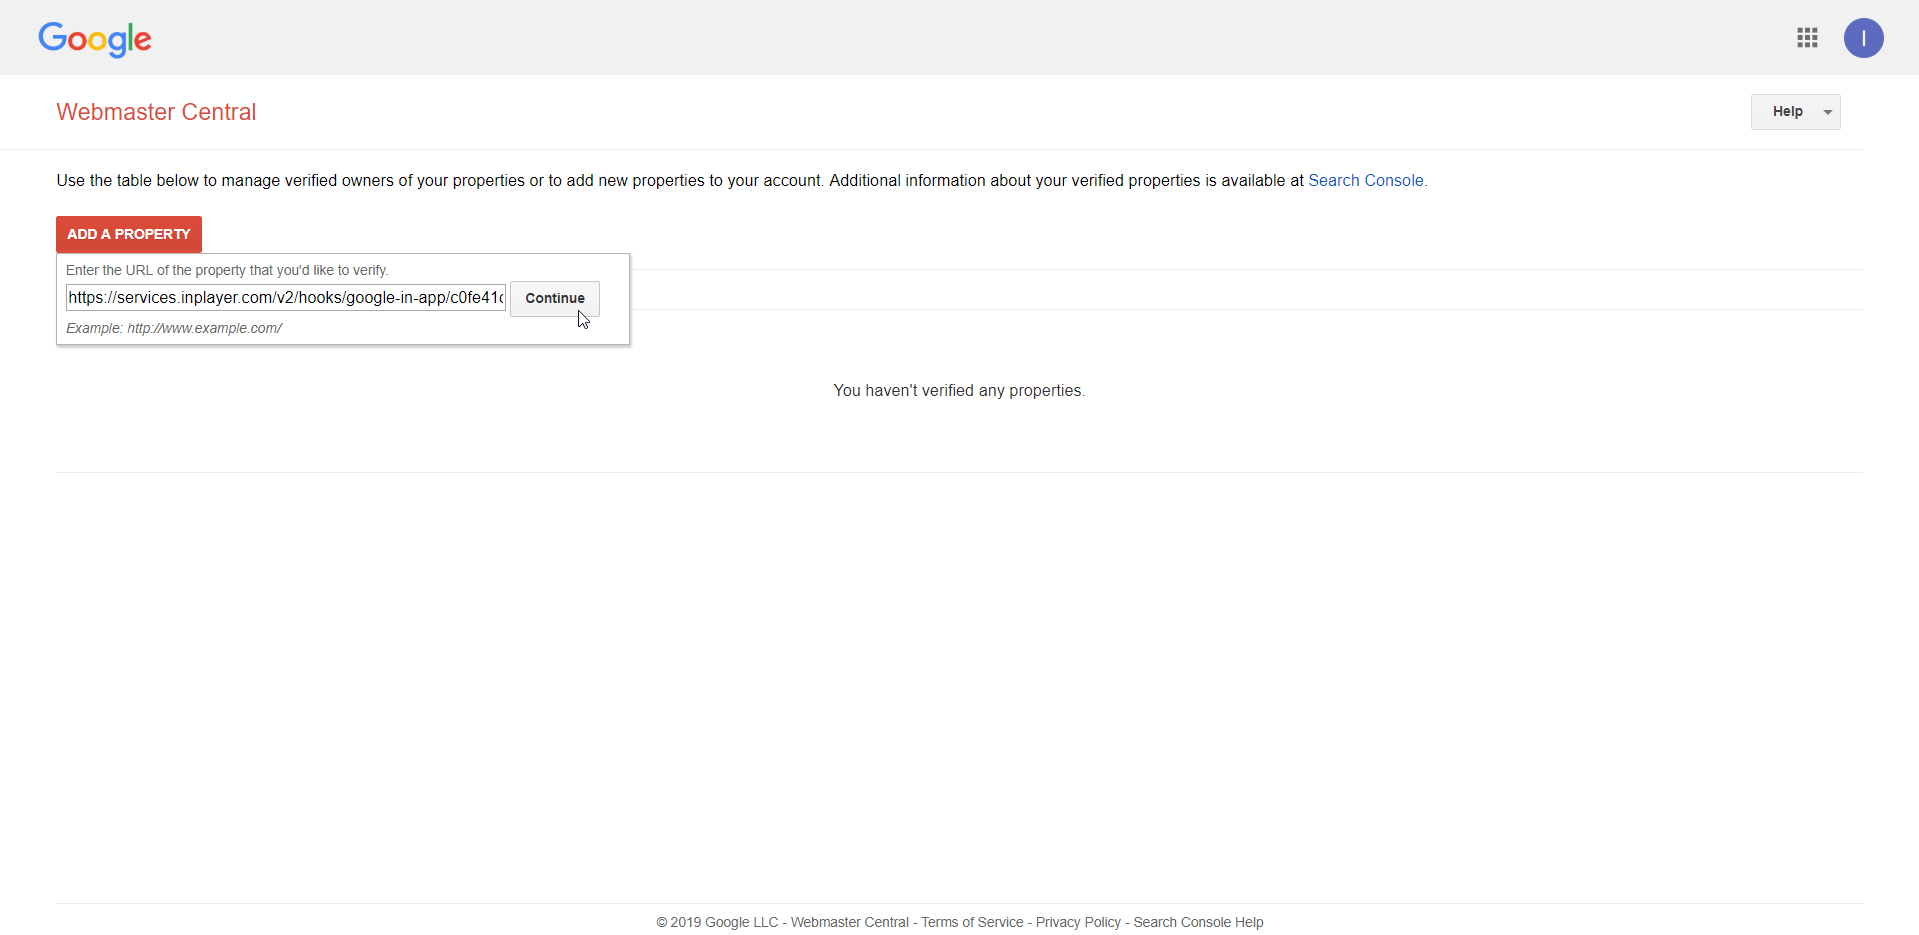
On the new screen, go to the Alternate methods tab.

Select HTML file upload and the verification token will be displayed.

Copy the token, without the .html part, and paste it in the InPlayer dashboard.
Before you can verify the token in Google, you will need to also enter the Android Service Key in the InPlayer panel, and save the settings there.
Read on to learn how to get the service key.
Go to the Google Cloud Platform.
You will need to create a new project and a topic.
*Note that this guide assumes that you do not already have a linked project in your Google Play Console. If you do, instead of creating a new project, use the existing one and create the topic there.
Start by creating the new project. (If you already have one, skip this step and move to creating the topic.)

 In the new project, click on
 ![]() .
.
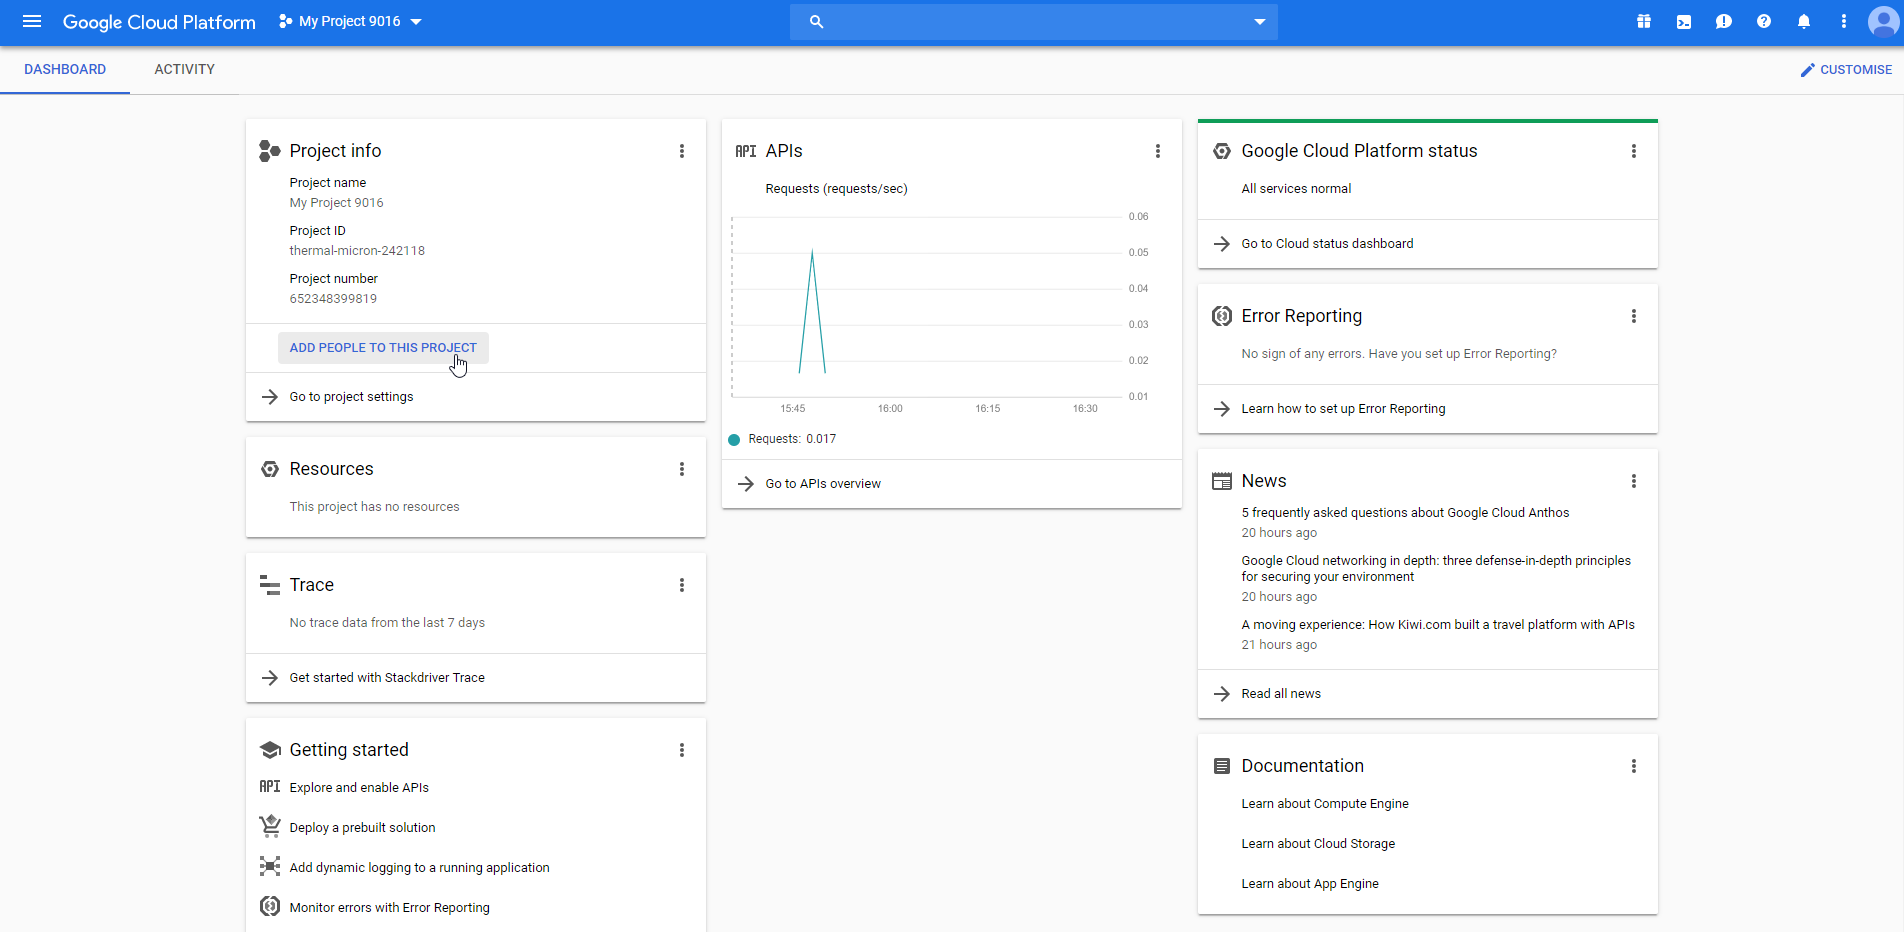
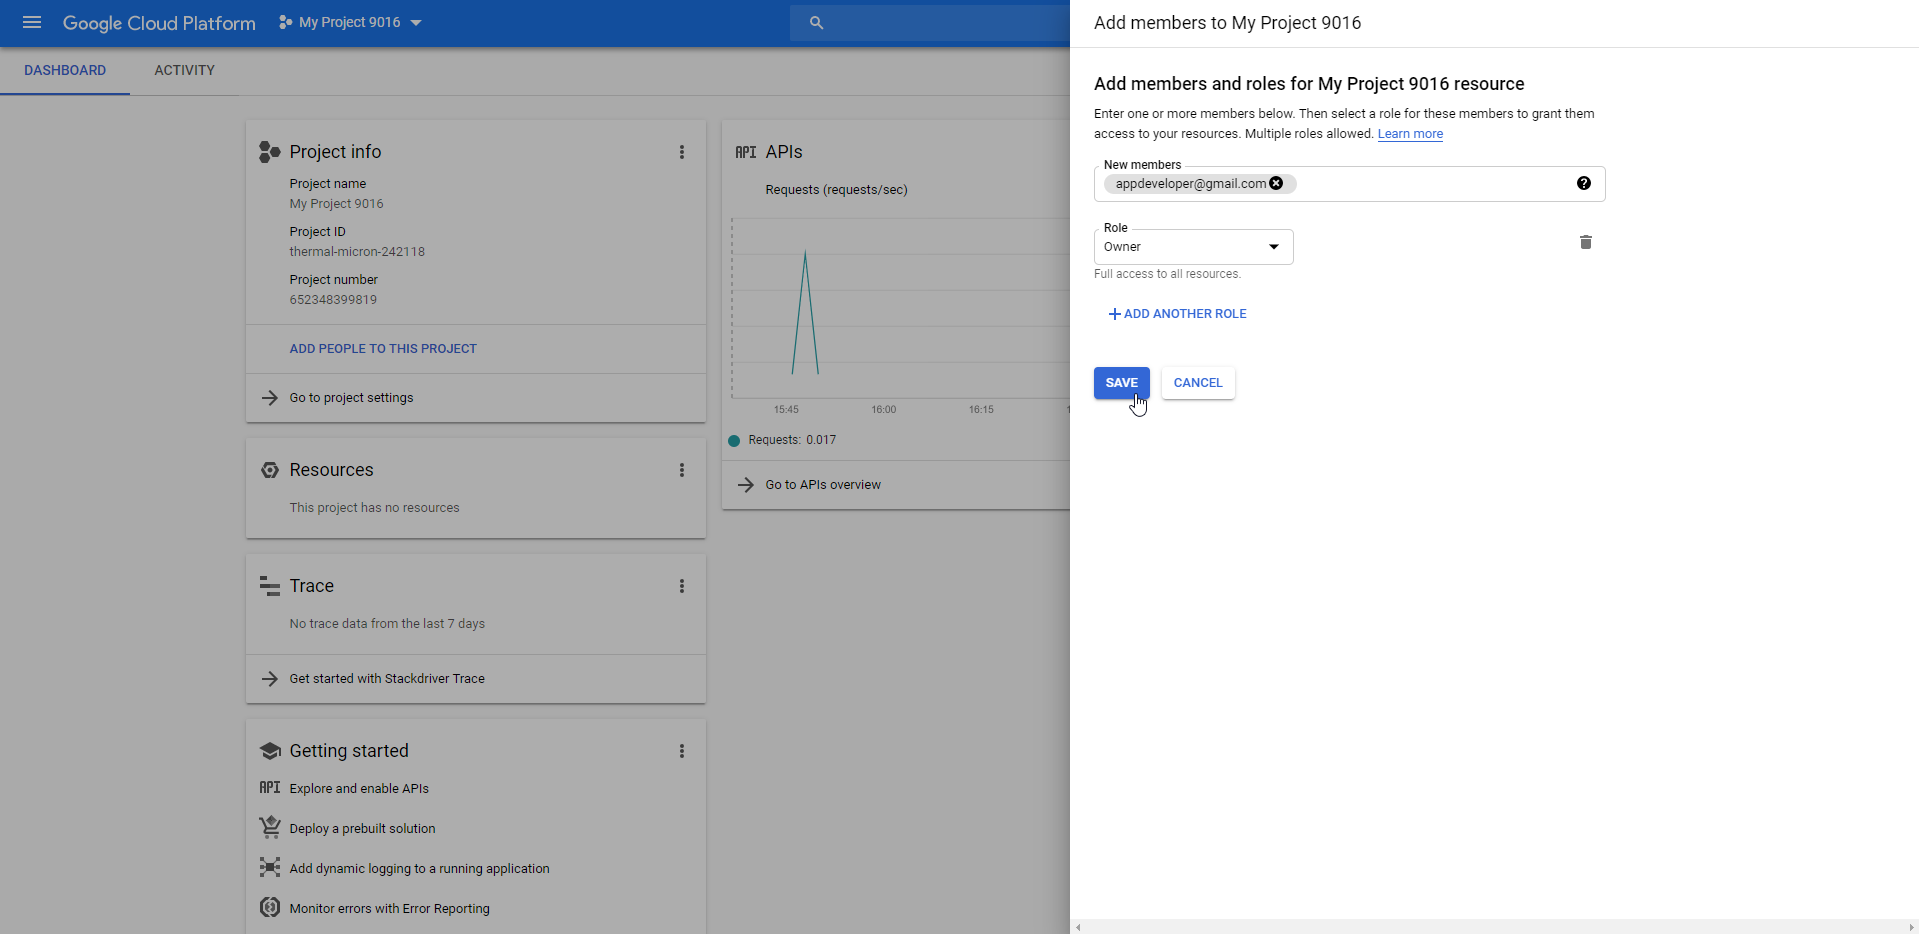
In New members, add the admin email of your Google developer account.
Under Roles, go to Project and select Owner.
Click ![]() .
.
You can now create the topic.
From the left-hand menu, scroll down to Pub/Sub, and click on Topics.
 Click on
 ![]() .
.
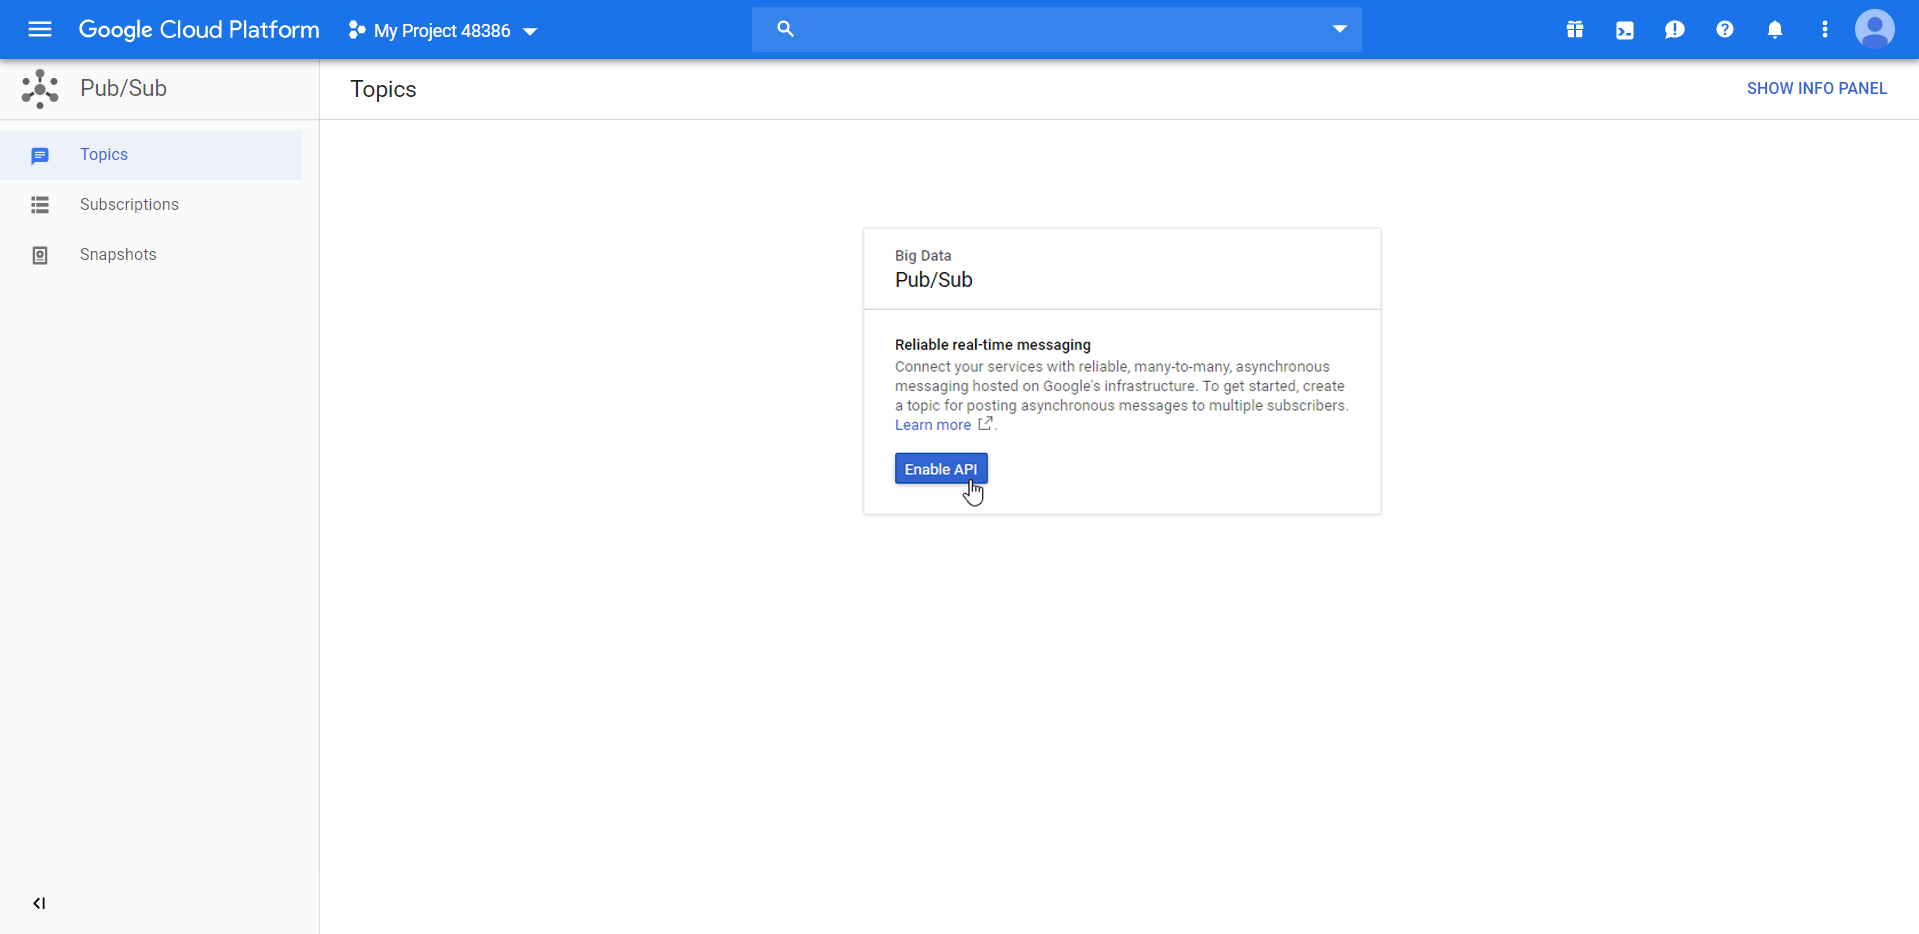
This enables API notifications to the InPlayer platform.
Next, click on ![]() .
.

Name the new topic inplayer-notifications. Copy the Topic ID and save it somewhere on your PC. You’ll need it later. Finally, click ![]() .
.

Click the three dots icon on the new topic and go to Permissions.
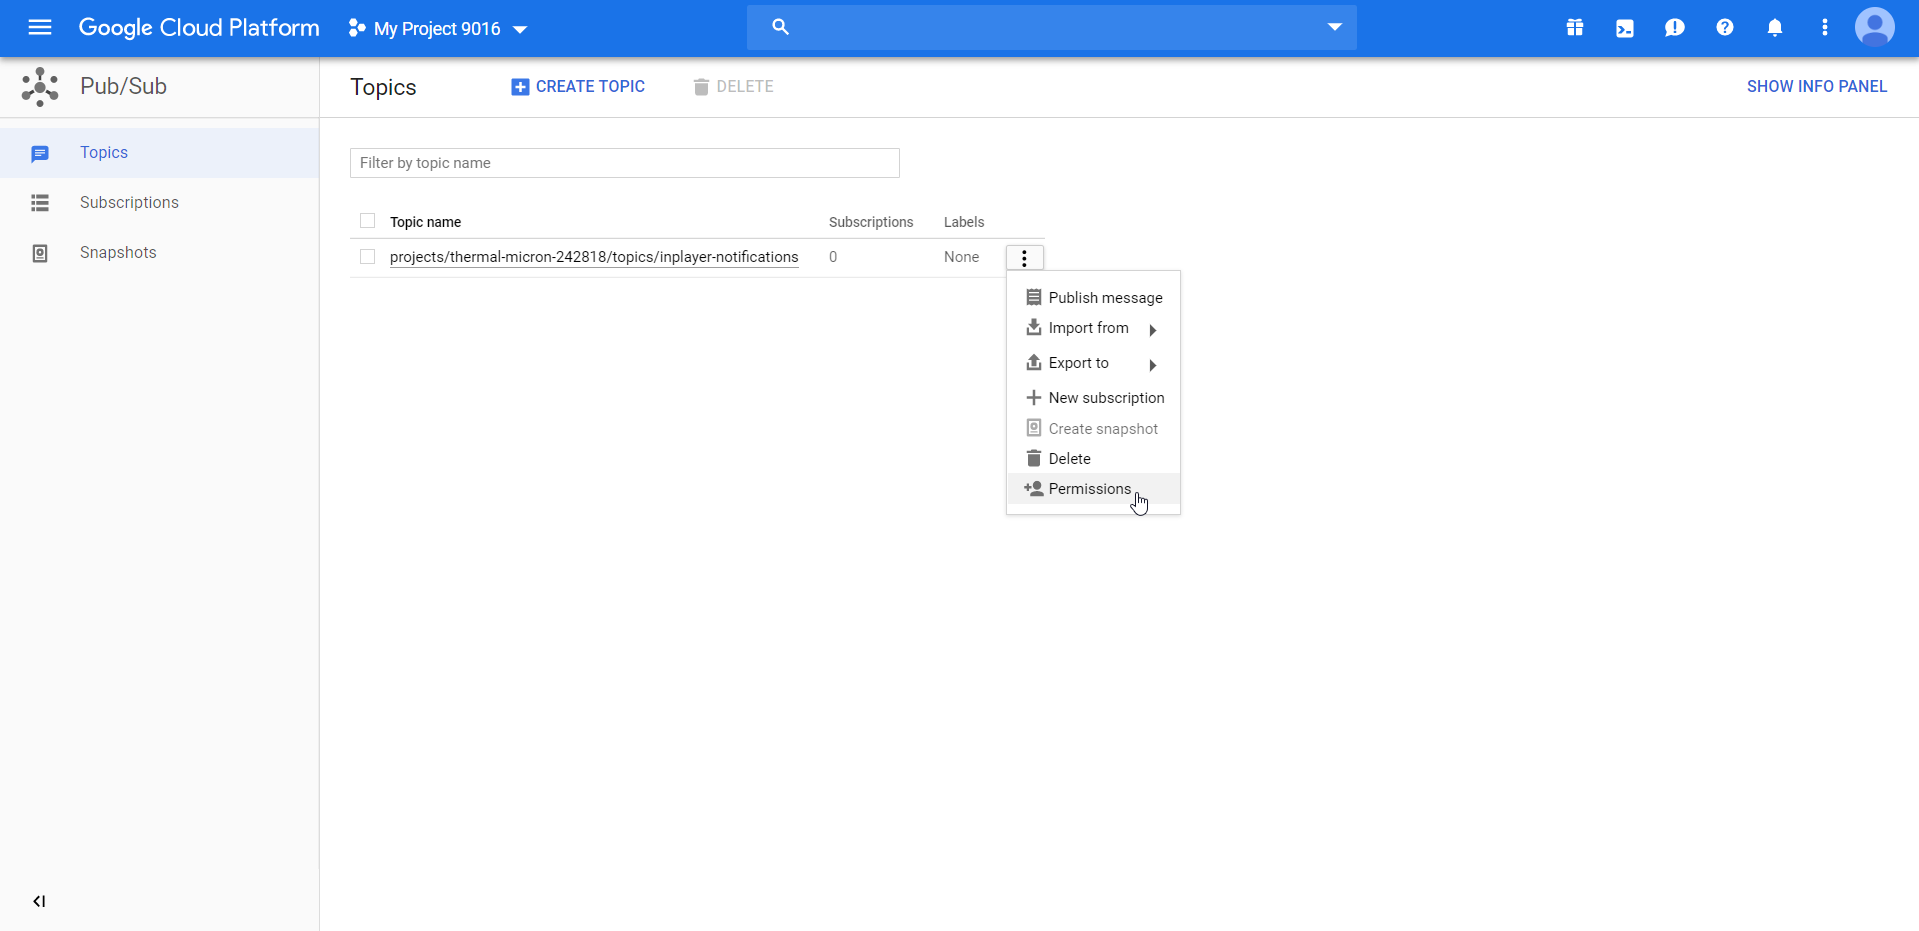 Click on
 ![]() .
.
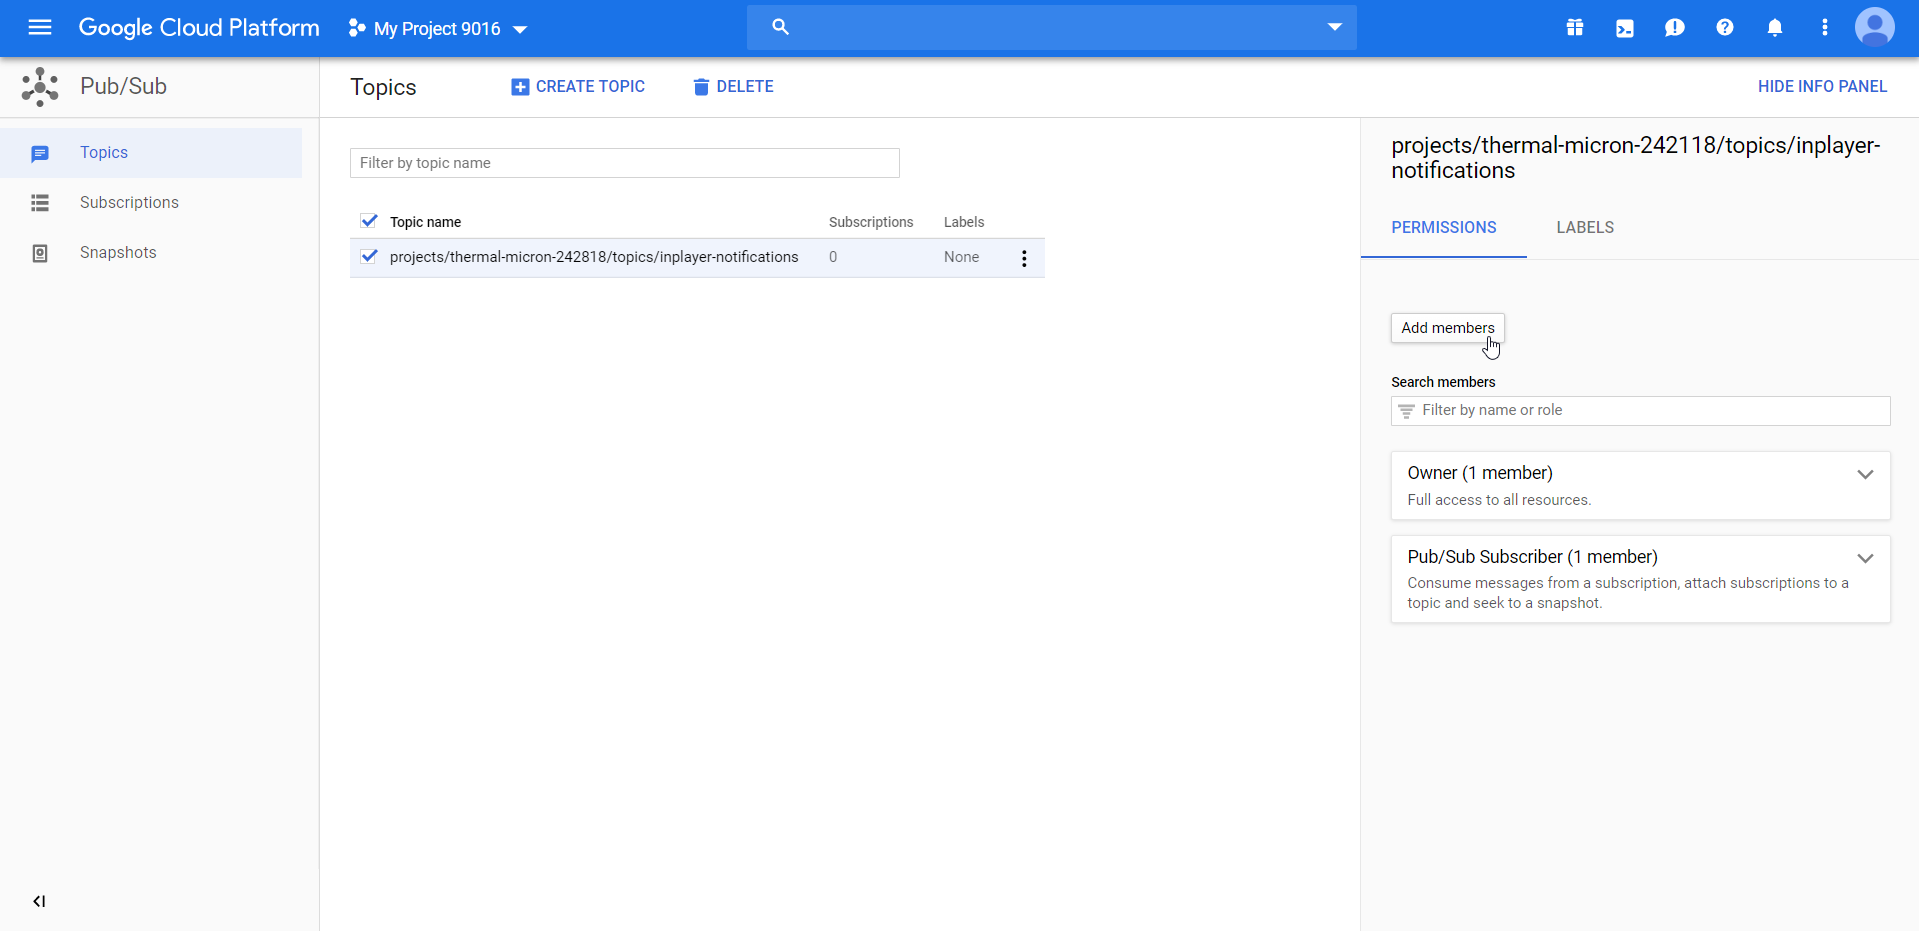
Under New members, add the following URL:
google-play-developer-notifications@system.gserviceaccount.com
Under Role, go to Pub/Sub, and select Pub/Sub Publisher.
The final setup should look like this:
 Click
Click ![]() .
.
Go to the API library, select your project, and click ![]() enable the API for it.
enable the API for it.

Next, you need to create a service account.
Go to the Credentials section of the Google APIs console.
Open the project you have created in the previous step.

 Click on
 ![]() and select Service Account Key.
and select Service Account Key.

Set up the new service account.

In Service account name, enter inplayer-notifications.
Under Role, go to Pub/Sub and select Pub/Sub Subscriber.
Under Key type, select JSON.
Click ![]() .
.
The file with the service key will be downloaded to your device.

Open the file in a text editor, copy the whole service key and paste it in the InPlayer dashboard.
Once you have both the Site Verification Token and the Android Service Key in the InPlayer dashboard, click ![]() .
.
You can now go back to the Google Webmaster Central and verify the Site Verification token as well.
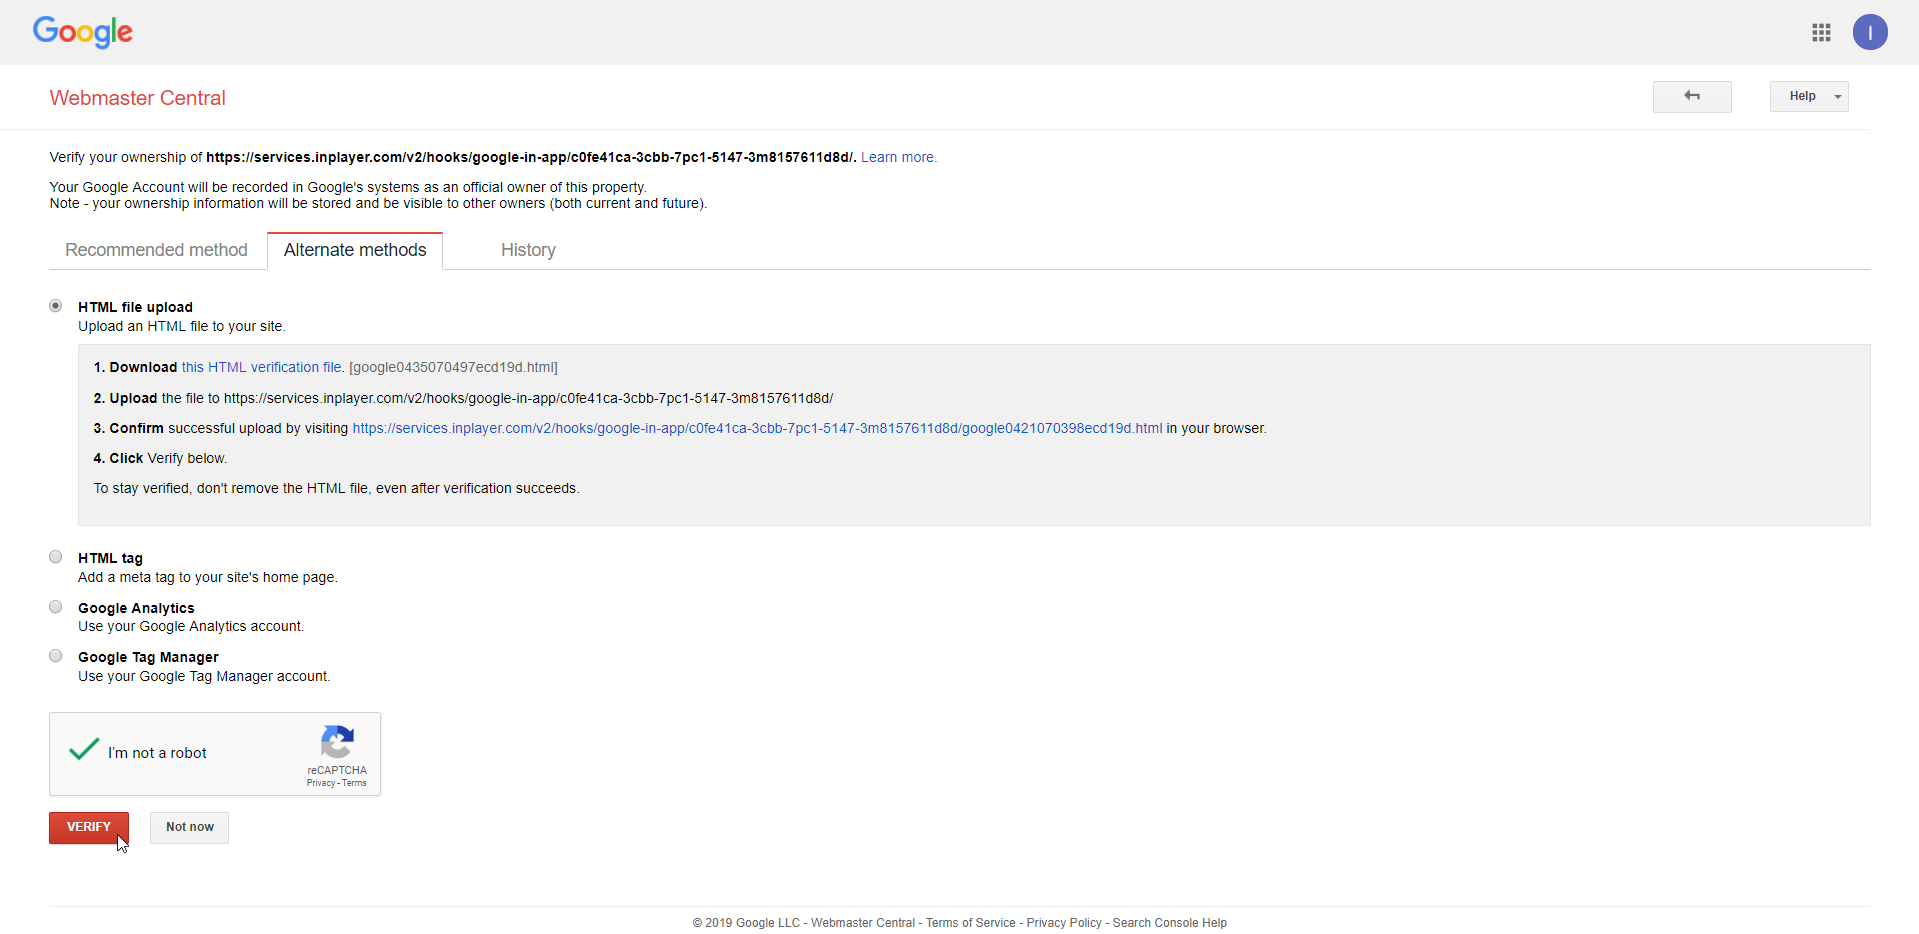
Once you verify the token, you now need to verify this same domain in the Google Cloud Console as well.
For this, copy the domain from the Google Webmaster Central, without the https:// part.
Go back to the Google Cloud Platform, and from the left-hand menu, go to API & Services and then to Credentials.
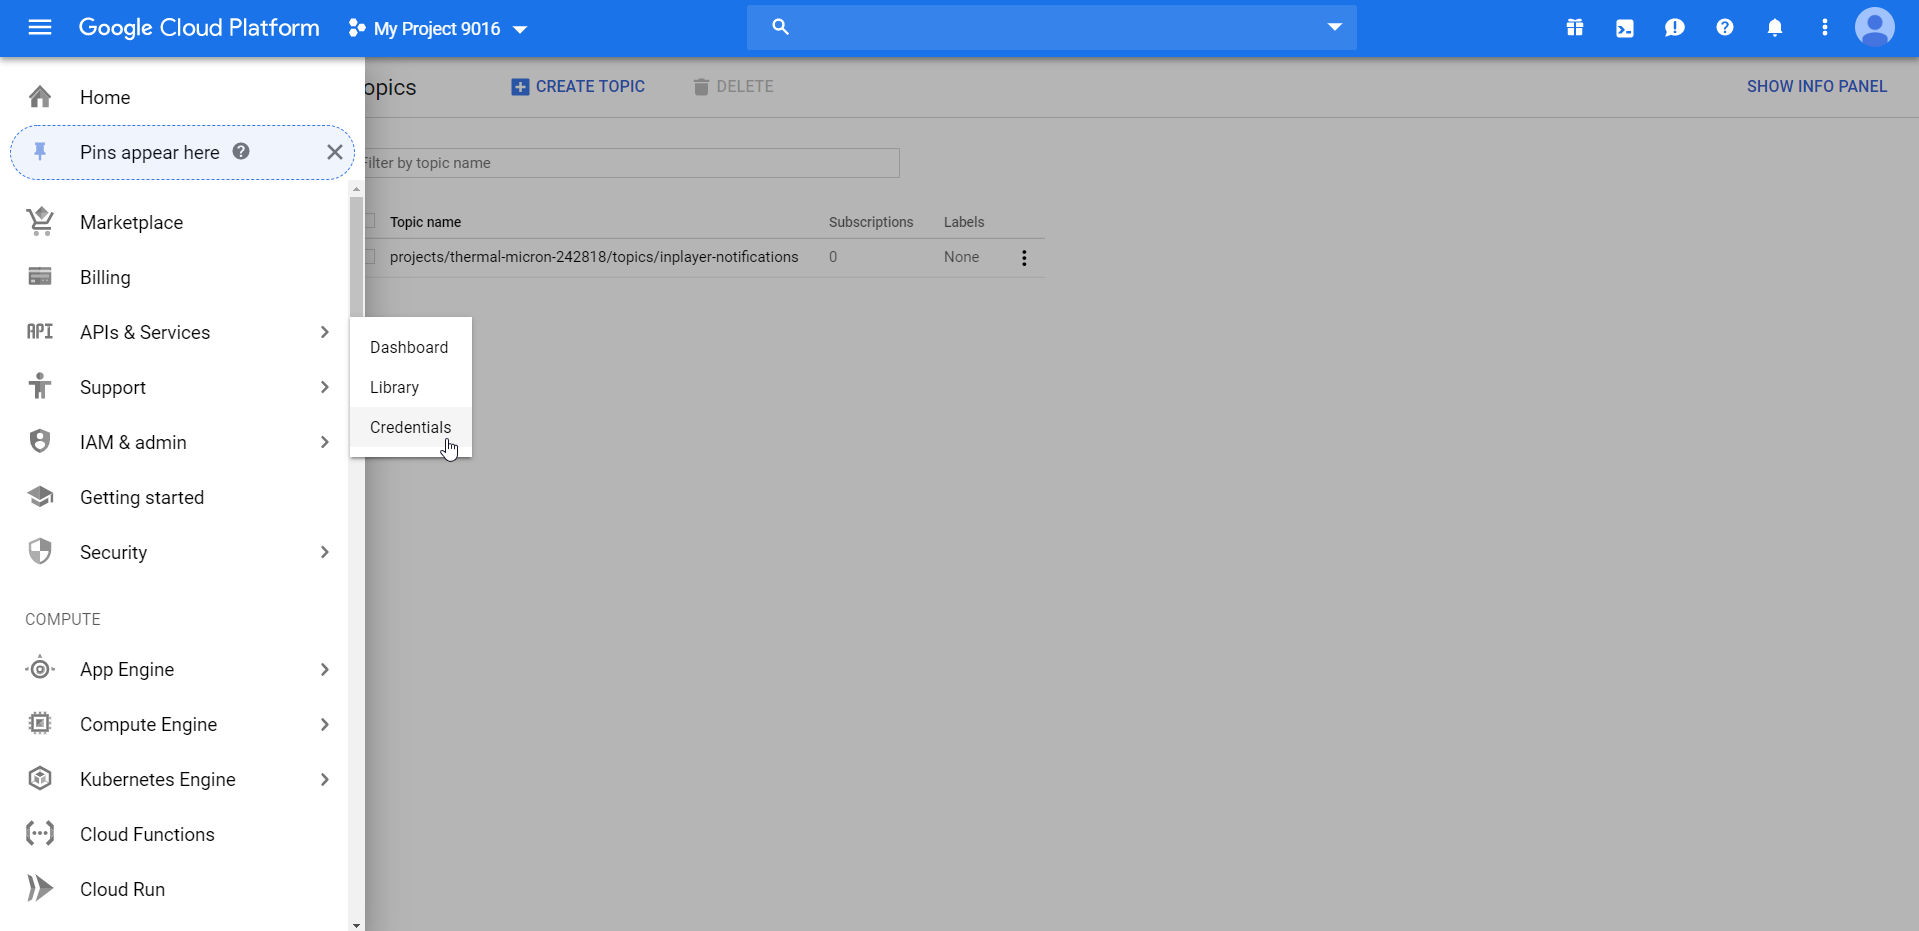 Go to the Domain verification tab and click on
 ![]() .
.
Here, you need to enter the domain you have verified in the Google Webmaster Central.
Paste the copied domain (without the https:// part) and click ![]() .
.

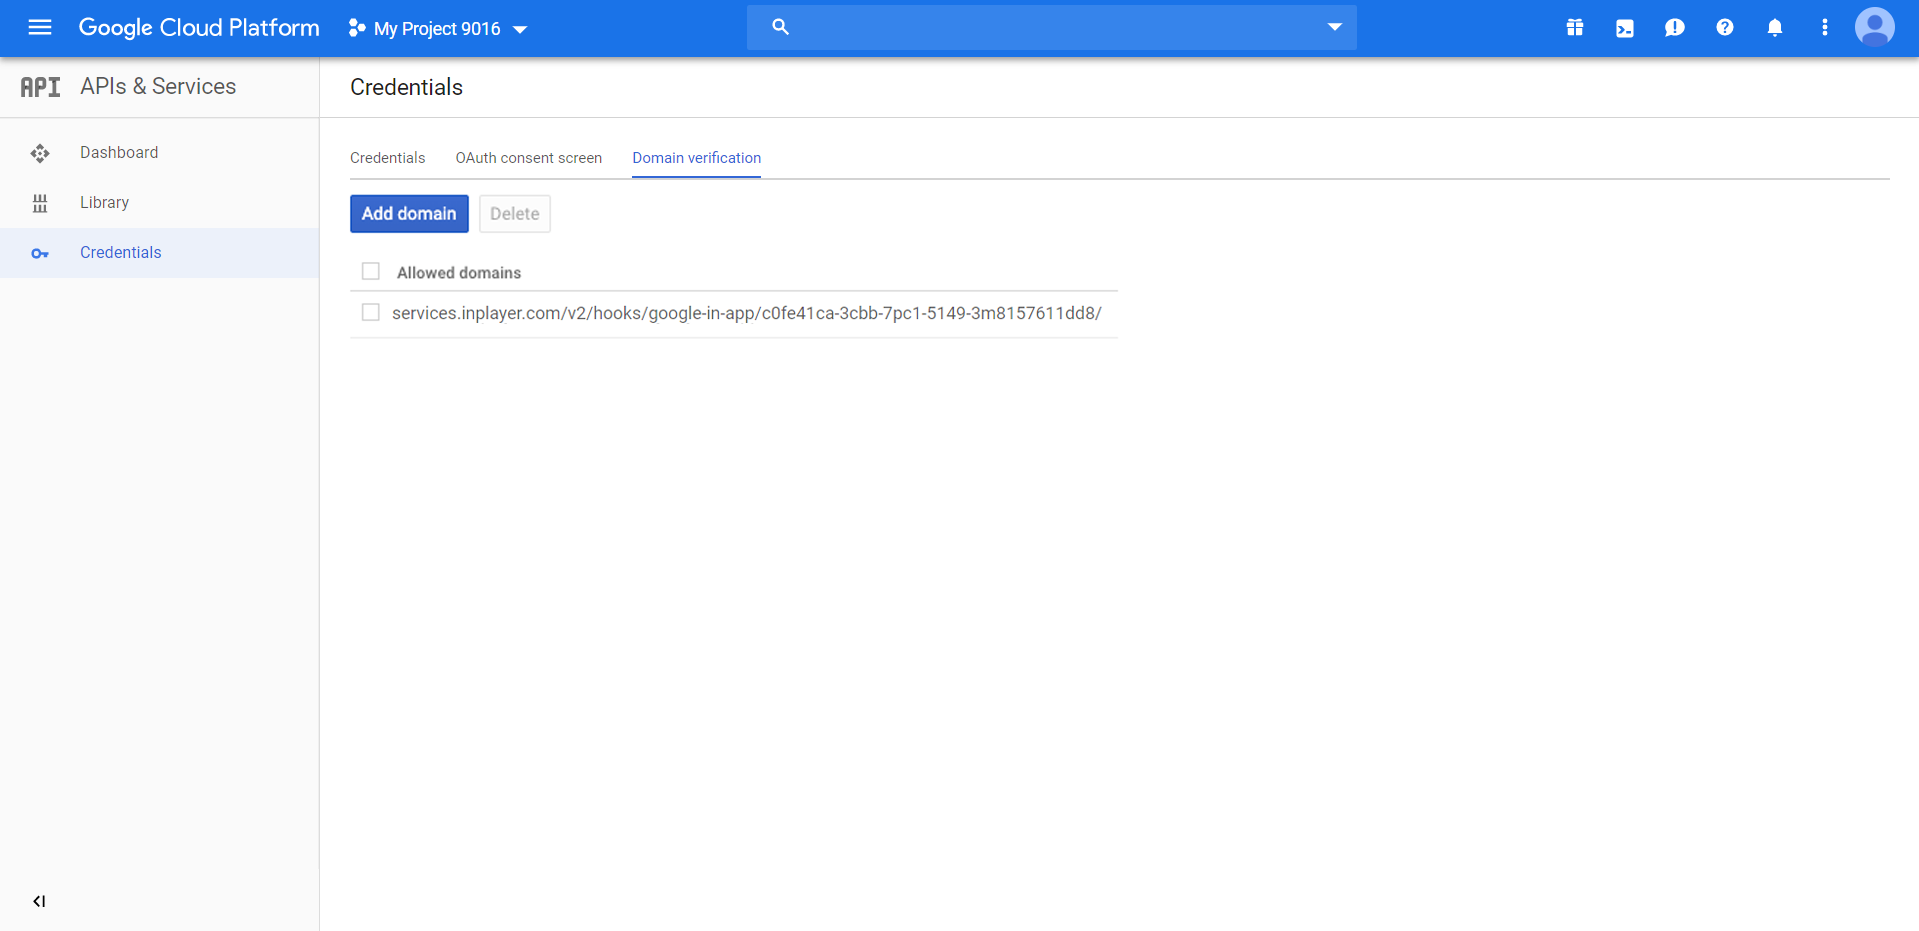
The verified domain will show up.
Now you need to create a new subscription.
Go to the Pub/Sub section of the Google Cloud Console, open the topic you’ve created previously and click ![]() .
.
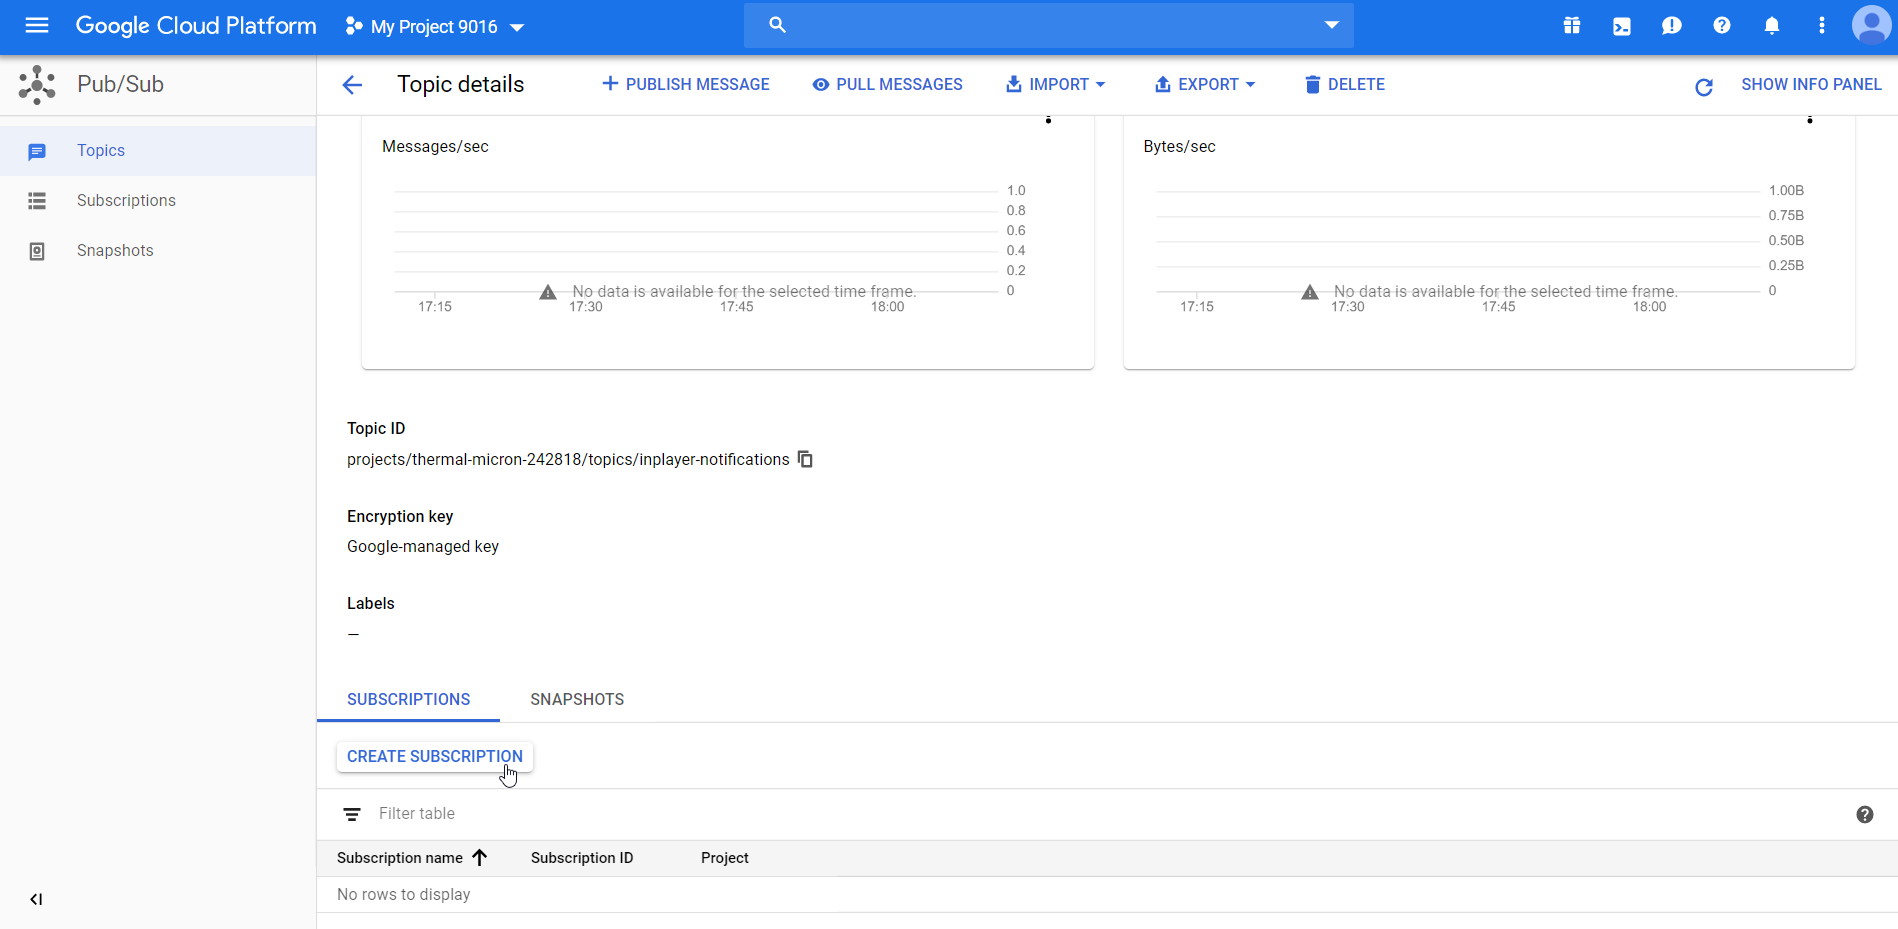
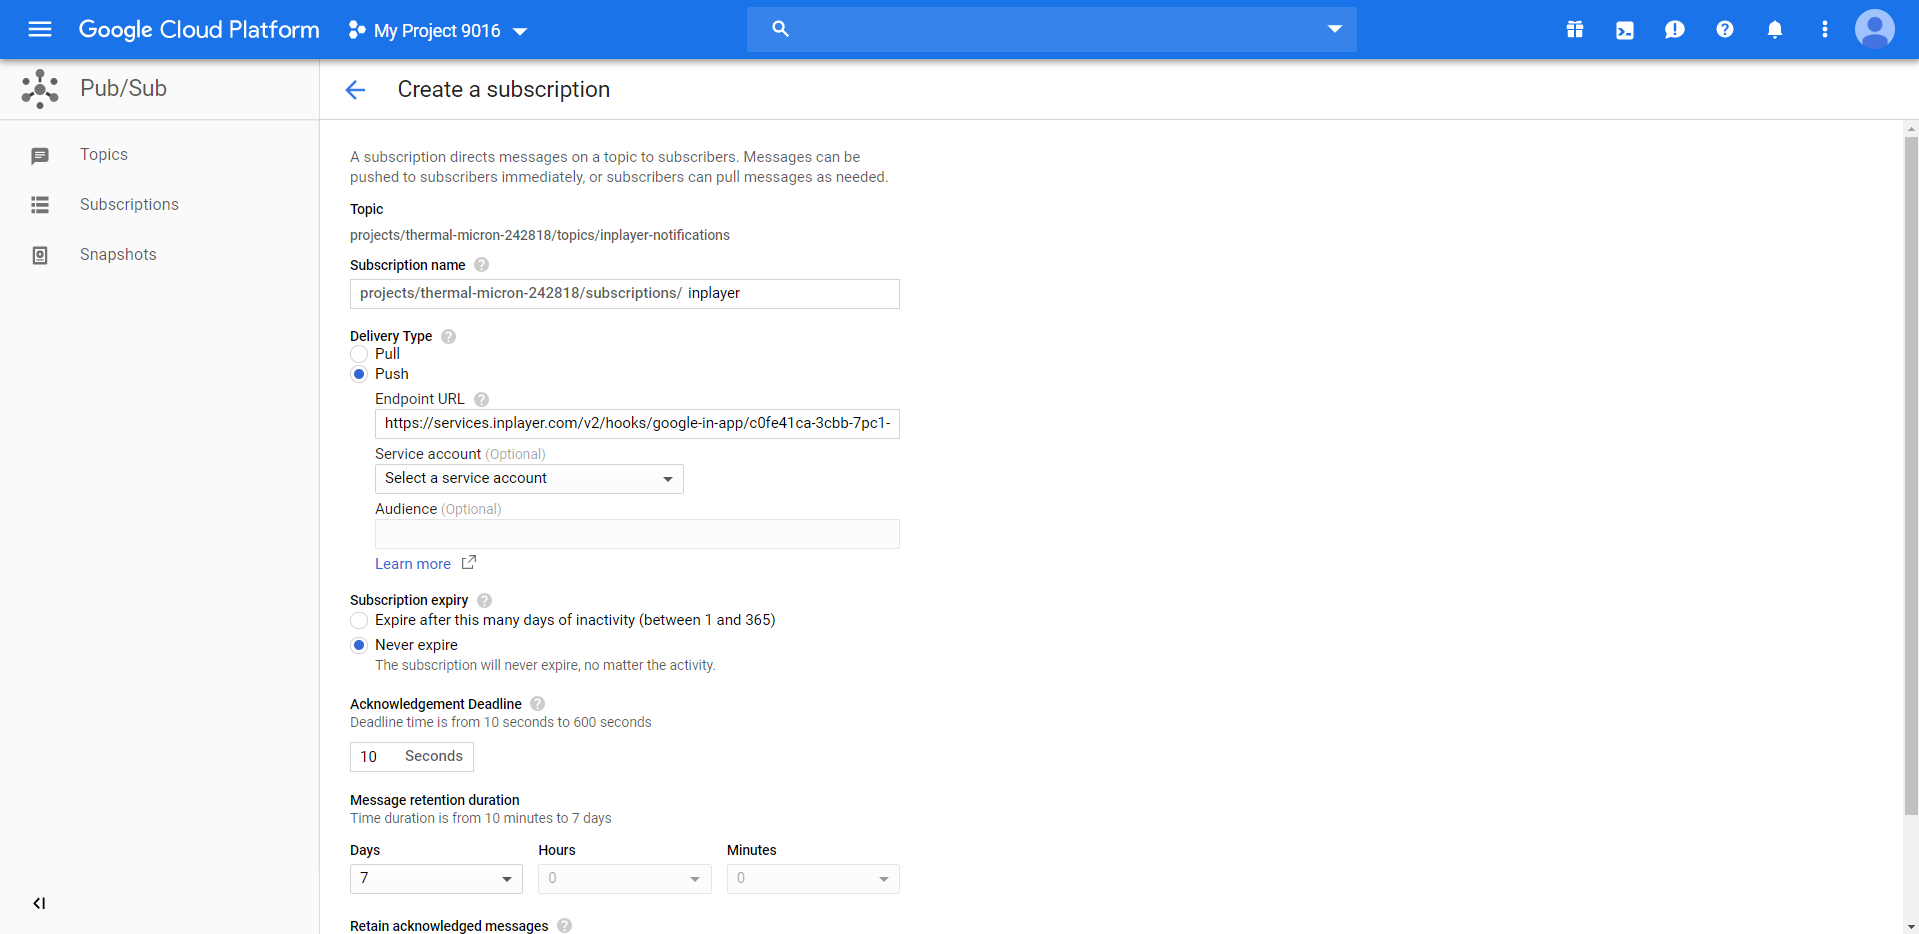
Give it a name.
Under Delivery Type choose Push, and in Endpoint paste the InPlayer notification URL.
To get the URL, go to the Integrations tab of your InPlayer dashboard.
Click the ![]() button.
button.

Paste the copied URL in the Google Cloud Platform form.
Under Subscription expiry choose Never Expire.
Click ![]() .
.
Next, go to the Google Play Console.
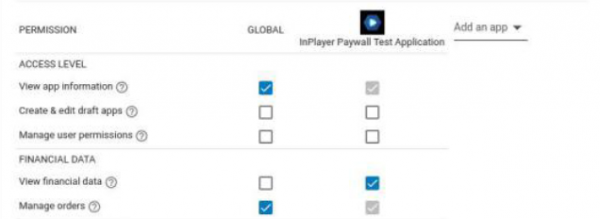
For the name of the new user, use the “client_email”: value in the Service Key you’ve downloaded previously.
It will look something like this:
inplayer-notifications@thermal-micron-242818.iam.gserviceaccount.com
Set up the following permissions:

Next, go to API access and click on Google Play Android Developer.
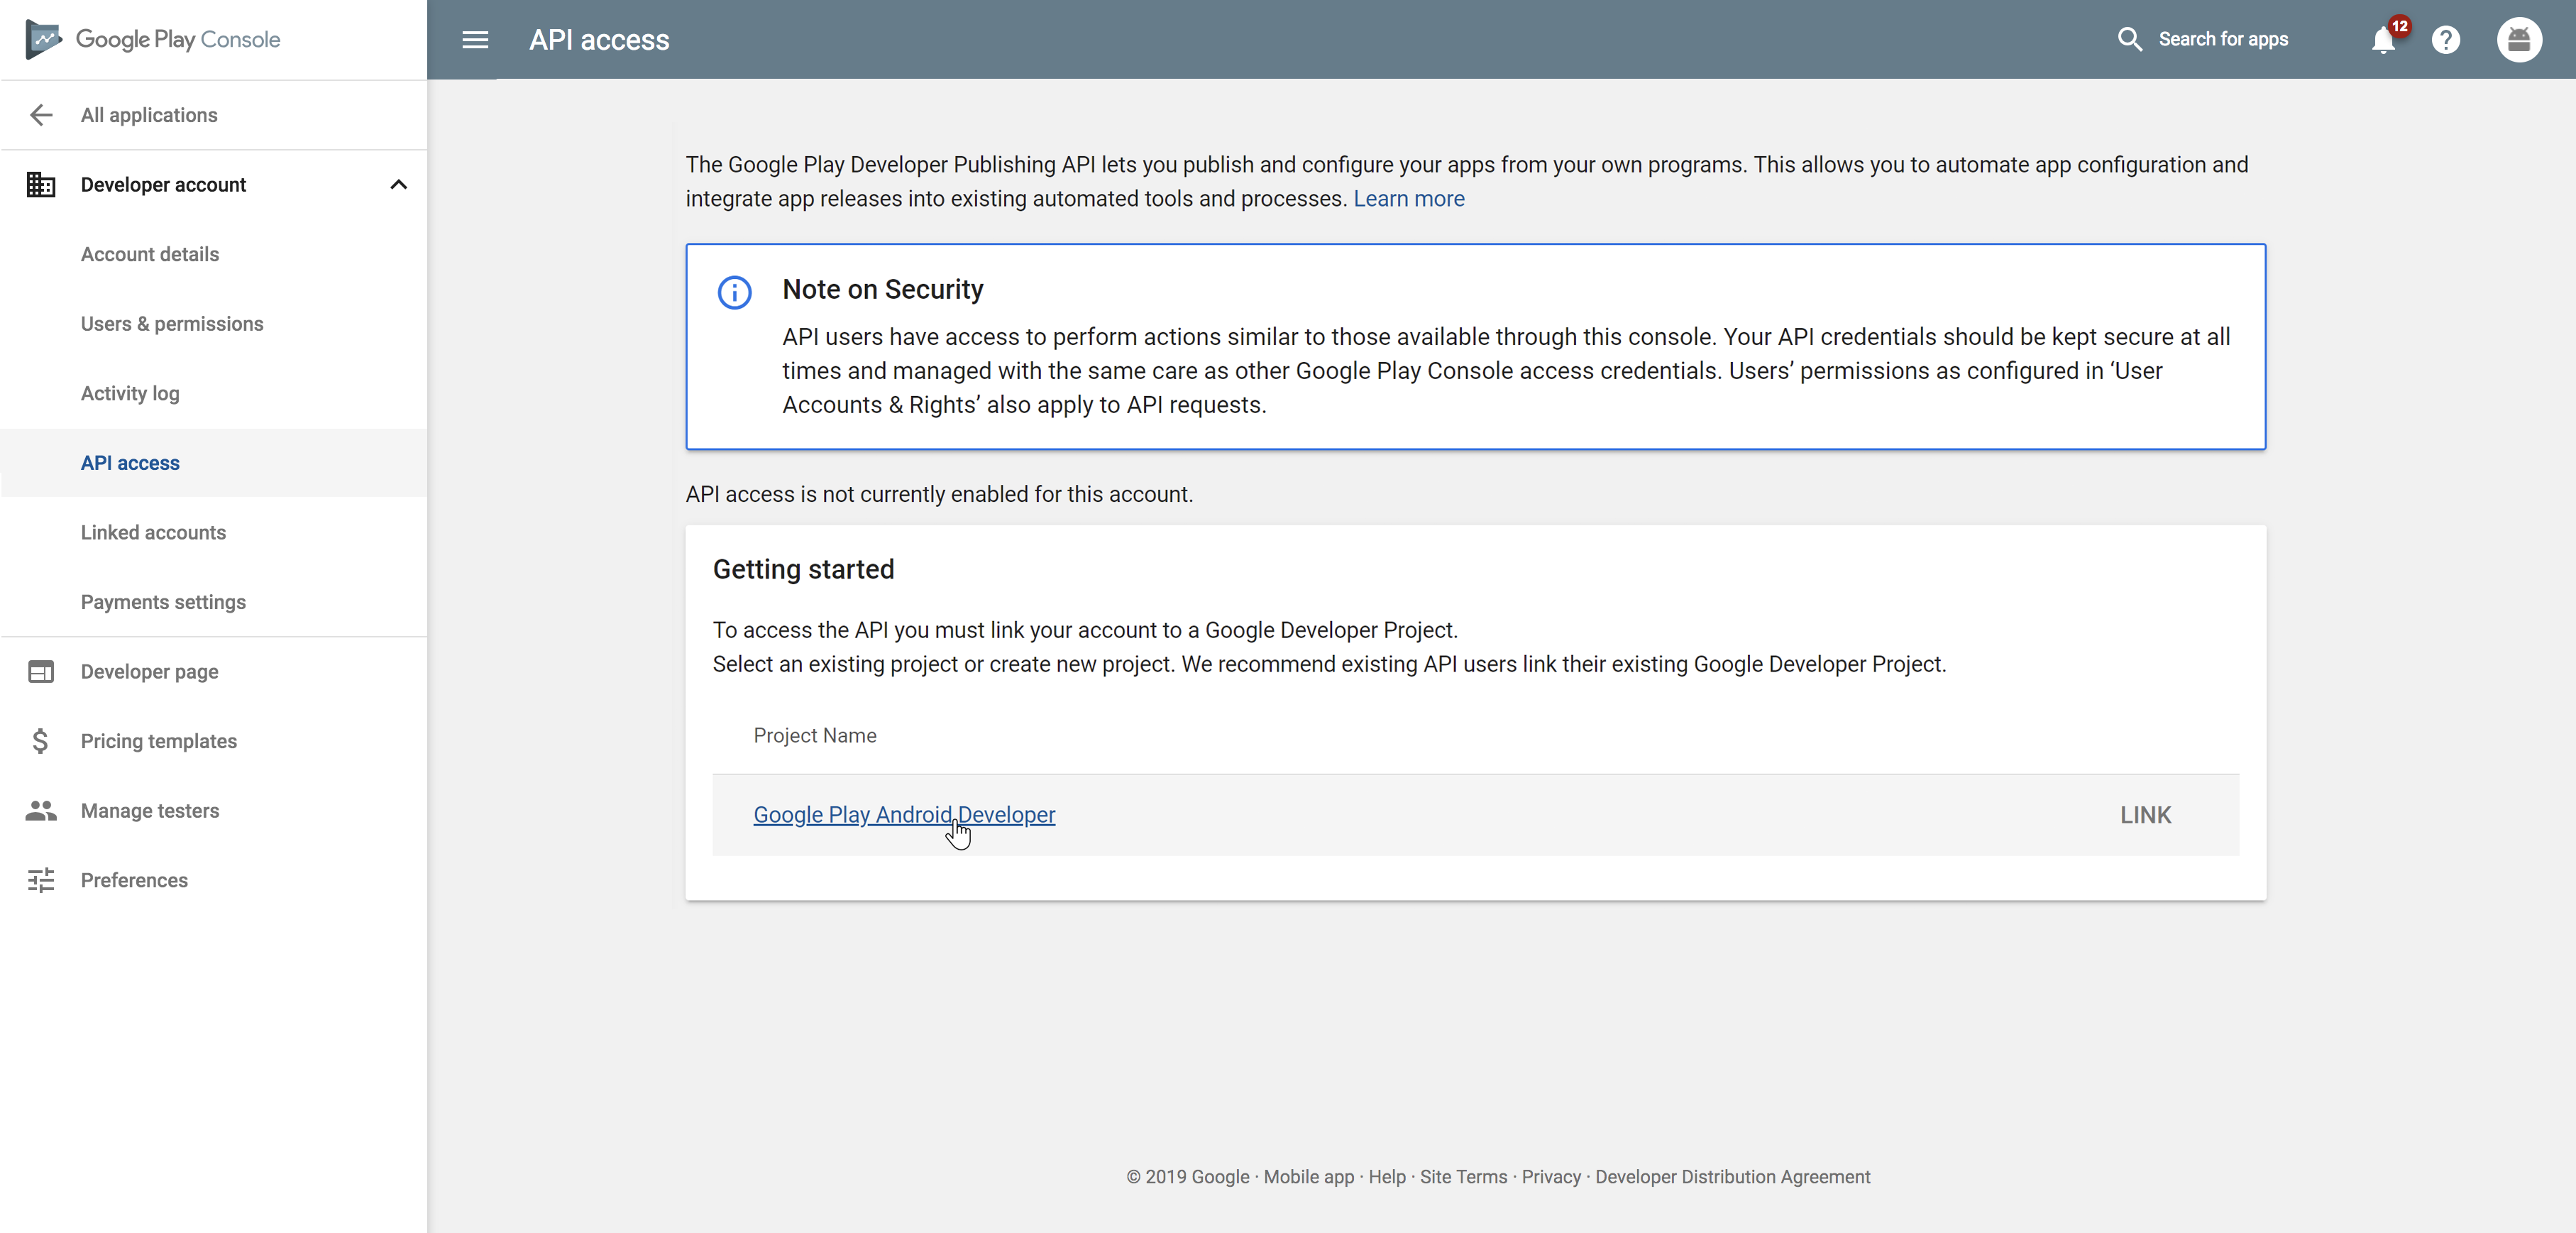
Click on the Google Play Android Developer drop-down menu at the top.

In Select from, choose inplayer.com, and select the project you’ve created previously in the Google Cloud Platform.
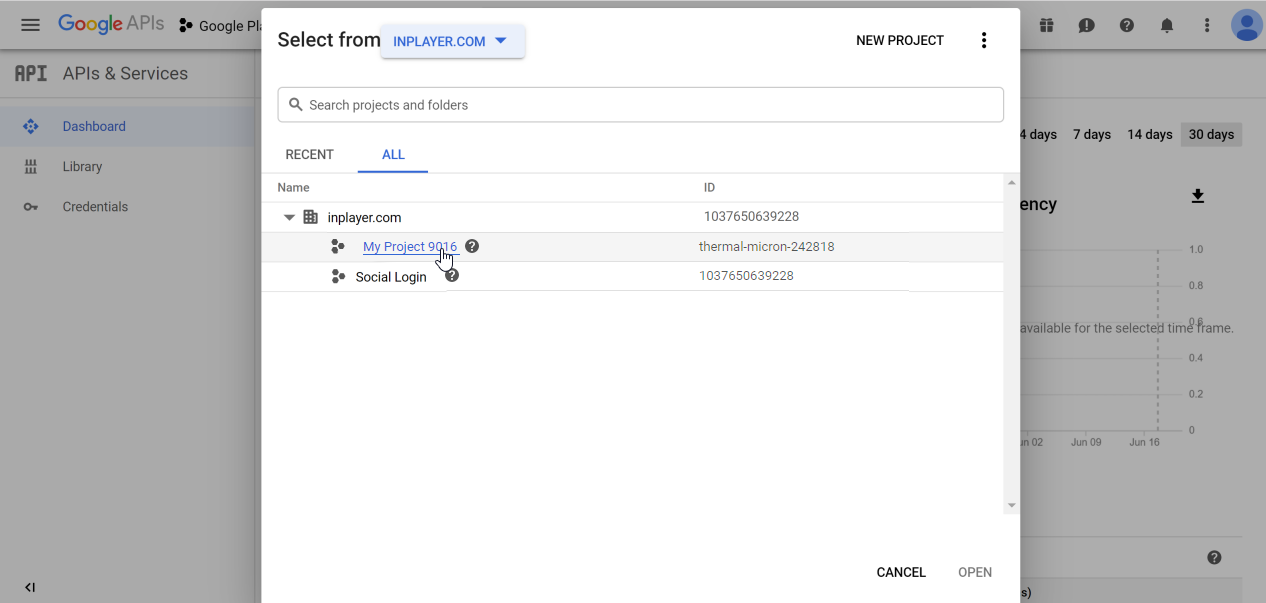
The project will appear in the API access section.
Note that if you have another project already linked (including the Googe Play Android Developer one), you will have to unlink it first, and then link the correct one.
Finally, go to All applications and click on your app.
Go to Services & APIs.
Under Topic name, enter the Topic ID of the inplayer-notifications topic you’ve saved previously.

Send a test, and save it.
In case you forgot to save the Topic ID previously, you can go back to the Pub/Sub section of the Google Cloud Platform where the Topic ID will be listed.
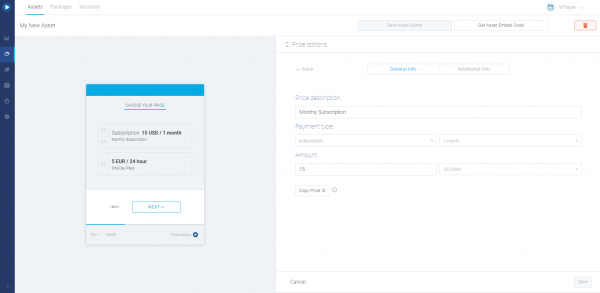
The next step is to create your InPlayer asset.
We offer several different types of assets, so make sure to look at this section for instructions on how to create the correct asset type, depending on your content.
Next, you need to create the Google Play product. This is going to be the Google Play Store counterpart to the price option you have previously set up for your InPlayer asset.
First, log into your Google Play Console.
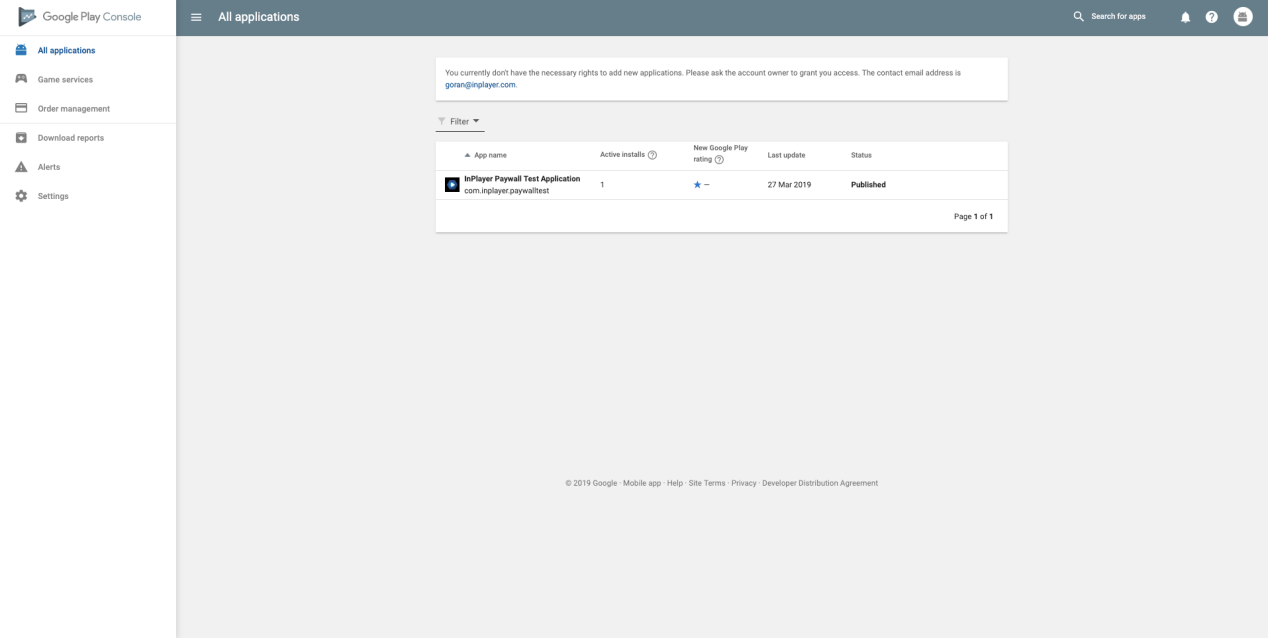
Open your Google app.
From the left-hand menu, go to In-app products, and then to Managed products.

Set up the new managed product.

In the Product ID field, enter the Product ID of the price option for the InPlayer asset you are monetizing.
To get the Product ID, go to the Assets or Packages tab of your InPlayer dashboard and open the asset or package you wish to use. Go to Price Options, open the price option for which you are creating the in-app purchase, and click the ![]() button.
button.
Paste the Product ID into the Product ID field in the Google Play Store product form.
Fill out the rest of the product details.
Remember to use the same price, as the one you’ve set up in the InPlayer merchant panel.

When you finish with everything, review your work, and click ![]() .
.

And with that, you are done.
First, log into your Google Play Console.

Open your Google app.
From the left-hand menu, go to In-app products, and then to Subscriptions.

In the Product ID field, enter the Product ID of the price option for the InPlayer asset you are monetizing.
To get the Product ID, go to the Assets or Packages tab of your InPlayer dashboard and open the asset or package you wish to use. Go to Price Options, open the price option for which you are creating the in-app purchase, and click the ![]() button.
button.
Paste the Product ID into the Product ID field in the Google Play Store product form.
You can only have a single in-app purchase (i.e. price option) for each subscription.
Fill out the rest of the product details.
Remember to use the same price and billing period here, as the ones you’ve set up in the InPlayer merchant panel.
Note that the default price here will be in USD, so make sure to take that into account.
Using the Introductory price option, you can enable discount vouchers which you can create in your InPlayer dashboard. Read the Creating an In-app Voucher section of our voucher guide for more on this.
Set the Grace Period to None.
When you finish with everything, review your work, and click ![]() .
.

And with that, you are done.
If you have any questions in regards to any of this, don’t hesitate to contact us on support@inplayer.com.

